Family Bike Touring: The Olympic Discovery Trail
Many people comment that they struggle driving a few hours with their kids, so how could they do an entire bike tour, being together that much? I laugh, because for me, the hardest part of these trip IS the drive!
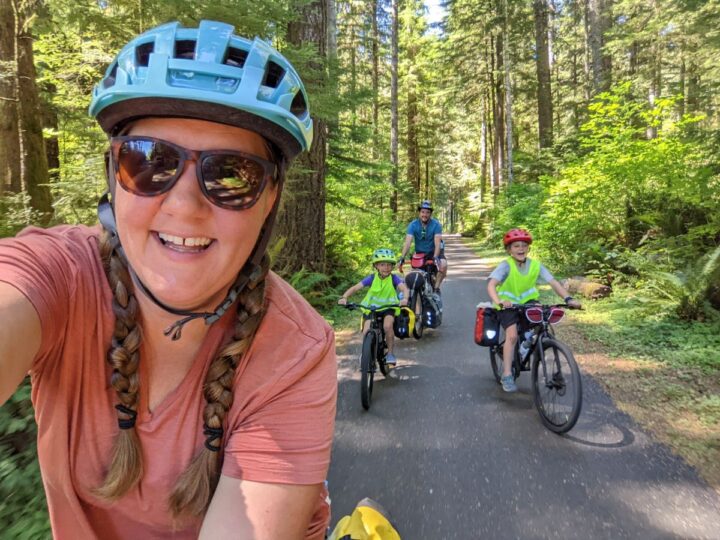
Once we get on our bikes, everyone relaxes and it creates some of the most quality family time I could dream up. Yes kids are still hyper, but no one is asking me for the tablet and no cell service means I’m much more engaged as well.
In this post you will find some of the details that were helpful in planning this bike touring trip for our crew, trail report, and some tips for a successful ODT bike packing adventure with your family!
As an Amazon Associate and member of other affiliate programs, we earn from qualifying purchases.
Why the Olympic Discovery Trail?
We are a family who loves bicycle touring. We often look to do long Rails-to-Trails for the bulk of our tours, since traffic and young kids don’t generally mix. They’re usually gentle grades, with towns accessible from the trail, and best yet- they’re car free. I had heard a few reports about the Olympic Discovery Trail in Washington state, and decided to put it high on my bucket list of tours.
A Fast Favorite
I’m glad I did- it easily became one of our favorite family trips so far. Cycling surrounded by rugged coastline, moss drenched towering Sitka spruce trees, and lush, fern lined trails- how can you not love it? Add in the bluest swimming holes you’ve ever seen and perfect sunny days- it felt like heaven.
Our route took us along the Olympic Discovery Trail, which is a mixed bag of paved rail trail, town bike paths, highways, back roads, and gravel trails. We then added on bits of Whidbey, Lopez, and San Juan Islands via ferry.
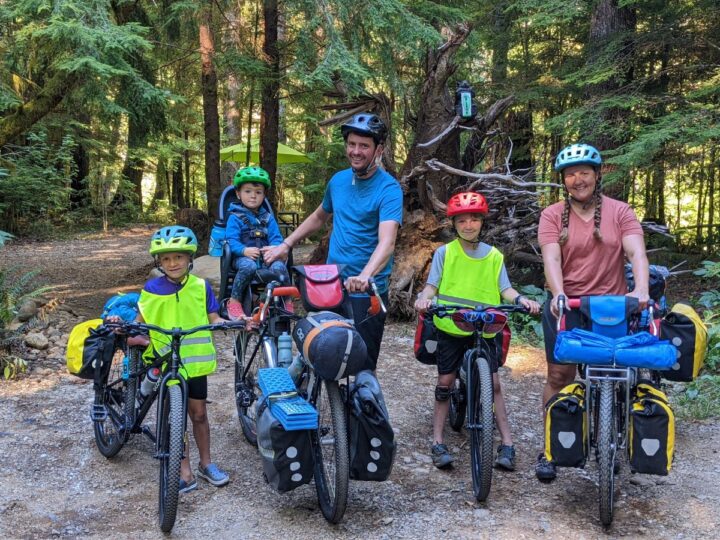
We took about 2 weeks to complete it, giving us ample time to explore the beaches, trails, and towns along the way. Overall, we covered 202 miles with our three kids, aged 9, 7 and 3.
“Growth Opportunities” Abound
However, this trip wasn’t without it’s challenges. It was a great opportunity for us to push past our comfort zones and overcome hard things with our kids. We live in a fairly flat valley, so we were not used to biking hills. The pacific northwest is full of them. Even on the bike path/rail trail, we found steep climbs. We were able to witness our kids overcome difficult terrain and impress us with their grit.
We also dealt with a few spots of tricky route finding and one of our bikes had some serious brake issues that we had to get creative to remedy until we could get to a bike shop. Luckily locals came through in both occasions to help us out. The Broken Spoke bike shop in Port Townsend deserves a special shout out for getting us out of a pinch last minute .
Intermediate Terrain on the Olympic Discovery Trail
It’s important to note- this is definitely not a beginner trip. So how does one prepare to ride those hills, paths and highways? Research and lots of practice! Experience makes challenging things much more do-able.
We’ve done several tours with our kids, which were fairly straightforward as far as terrain and route finding. They’ve learned how to travel by bike on flatter terrain, carry gear, and camp along the way. Other rails to trails provided them with the experience to progress to this intermediate route and safely handle highway sections and big hills.
Olympic Discovery Trail Bikepacking Preparations
Planning from afar
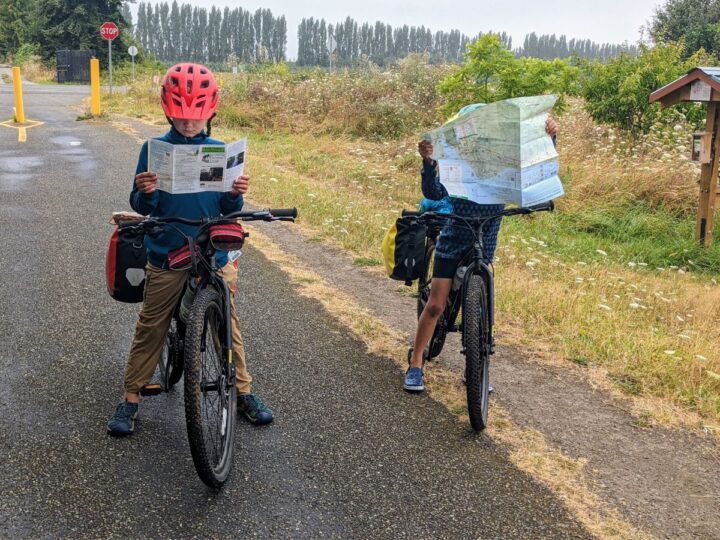
Planning for this trip was a bit difficult, since we’d never been previously and live about 16 hours from there. We used a lot of online forums, the ODT website and others to get information, maps, and ferry schedules. But when it came down to it, we just had to go there and figure things out on the ground. Honestly, that’s part of what I like a about bike travel- the adventure of not knowing exactly what you’ll encounter.
That said, I will hopefully be able to give enough information here to help make this trip feel possible for other adventurous families. I couldn’t find many first hand trip reports of families riding these routes, so I guess I’ll be that for someone else!
The great thing about this area- there are so many options! You could ride the entire ODT self supported with all your gear, or you could have a vehicle support and ride sections that sound appealing. You could ride it out and back as a shorter trip. There is plenty of camping, with ‘Hiker-Biker’ sites at most of the state parks, as well as private campgrounds. It is mostly rural, so no need to worry about big cities to navigate.
Olympic Discovery Trail Route Map

The Olympic Discovery Trail website has all the sections of the trail mapped out. You can just download them and use the online versions for free, or you can order the entire set for $13 if you prefer paper maps. There are also maps at each trail head, but we found many of the more popular ones were usually out. It runs from La Push, WA to Port Townsend, so you can start in either of those towns, and ride west or east.
Olympic Discovery Trail Bike Touring with Kids Itinerary
This is our basic itinerary to give you an example of daily mileages and campground options. You could easily shorten days, explore other camping options, etc. As I said before, the islands are an add on option, so you could also just end at Port Townsend to simplify.
- Day 1 – Beaver campground to Fairholme CG (Lake Crescent) – 25 miles
- Day 2 – Fairholme to Crescent Beach (private CG) – 17 miles
- Day 3 – Crescent Beach to Port Angeles – 26 miles
- Day 4 – Port Angeles to Sequim – 19 miles (hotel night)
- Day 5 – Rest Day (6 miles to Sequim Bay State Park from town)
- Day 6 – Sequim Bay to Port Townsend (including a 6 mile shuttle) – 26ish miles
- Day 7 – Port Townsend to Fort Ebey State Park (via ferry ride and 10 miles of riding)
- Day 8 – Ft. Ebey to Lopez Island (Odlin Park CG) – 18 miles (plus a bus and ferry ride)
- Day 9 – Odlin CG to Spencer Spit State Park – 20 miles around Lopez Island
- Day 10 – Ferry ride to Friday Harbor, plus 10 miles riding around San Juan Island
- Day 11 – Rented a Uhaul, packed up and ferried/drove back to Beaver to pick up our van
Bikepack ODT Shuttle Logistics
Since the trail is an out and back, you need to figure out where to leave your car and how to get back to it. We called several places in advance to figure out where to leave our car safely for two weeks, and didn’t come up with many options. Ultimately, we made friends with a campground host who let us leave our van there while we biked.
There were no shuttle services that we found, so we figured we could either take the bus system back or rent a car. We ended up renting a U-haul in Friday Harbor, loading our gear/bikes in the truck and driving ourselves back to Forks.
There are buses that run from Port Townsend to Sequim, Sequim to Port Angeles, and Port Angeles to Forks. See Jefferson Transit for the Port Townsend bus system and Clallam Transit for the Sequim-PA-Forks buses. Local buses in Clallam and Jefferson County have bike racks for 2 bikes. See their websites for details.
https://olympicdiscoverytrail.org/visit/getting-here/
Another option would be to ride the trail out and back, catching all the things you miss on the way out. Or, find a friend who is willing to drop you off and pick you up. It seems everyone knows someone who lives near Seattle, right?! Either way, it’s a tricky problem and you’ll have to get creative to solve it, but where there’s a will, there’s a way.
Family Bike Touring the ODT
Get Creative From Day One

After driving 16 hours to start a 2 week bike tour across the Olympic Peninsula with our kids, we realized too late on the first night of the trip we’d packed the wrong tent poles.
At least two or three hours from the nearest sporting goods store and not wanting to buy a whole new tent, we decided to improvise with tarps. And that is how to be successful bike touring/packing with kids. Yes, you’ll forget important items, or break things, or make wrong turns. But if you’re willing to get creative and resourceful and push on anyway, then bike travel is for you!
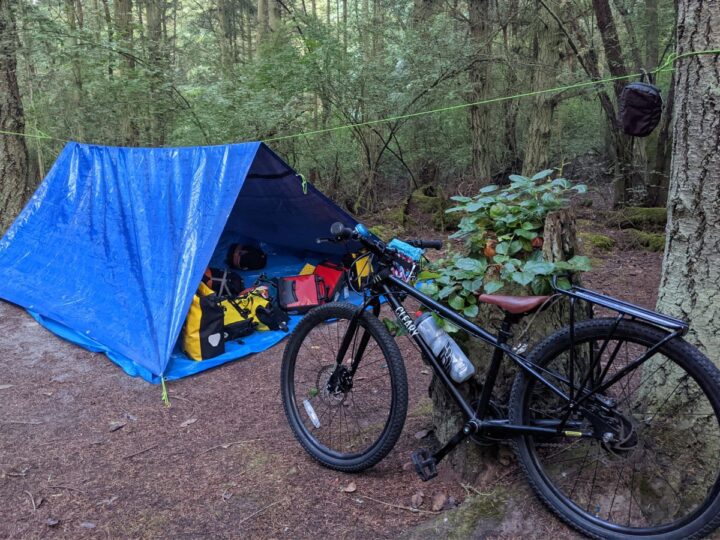
After all, we were on the Olympic Peninsula! We weren’t going to let a couple of tent poles get in our way! We slept under the stars that night, found a hardware store the next morning and bought a tarp. Luckily, in our early years of adulthood, my husband and I guided at a wilderness therapy camp where we perfected our tarp shelter skills. We were kind of excited to re-live a little of that with our own kids.
Back Road and Bike Path Bliss

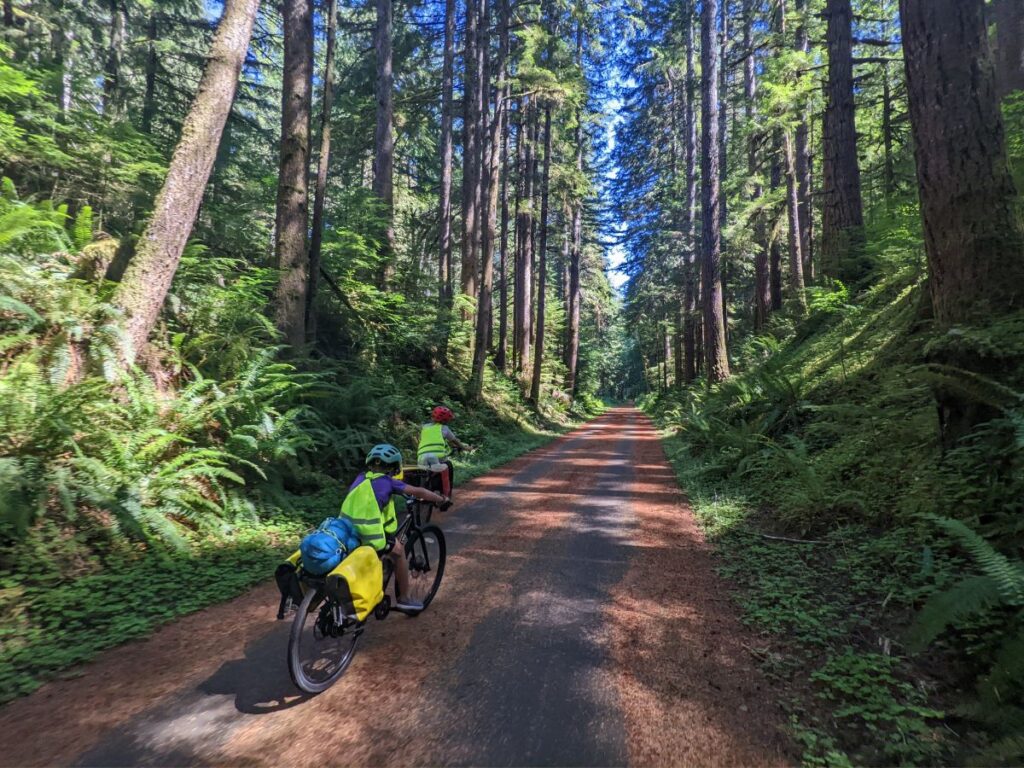
The next day, after playing at some of the famous beaches and visiting the Hoh rain forest (for more hike ideas, check out this article: Best Olympic National Park Hikes!), we set off near the town of Forks, WA. The first half of that day was quiet back roads through seas of pines.
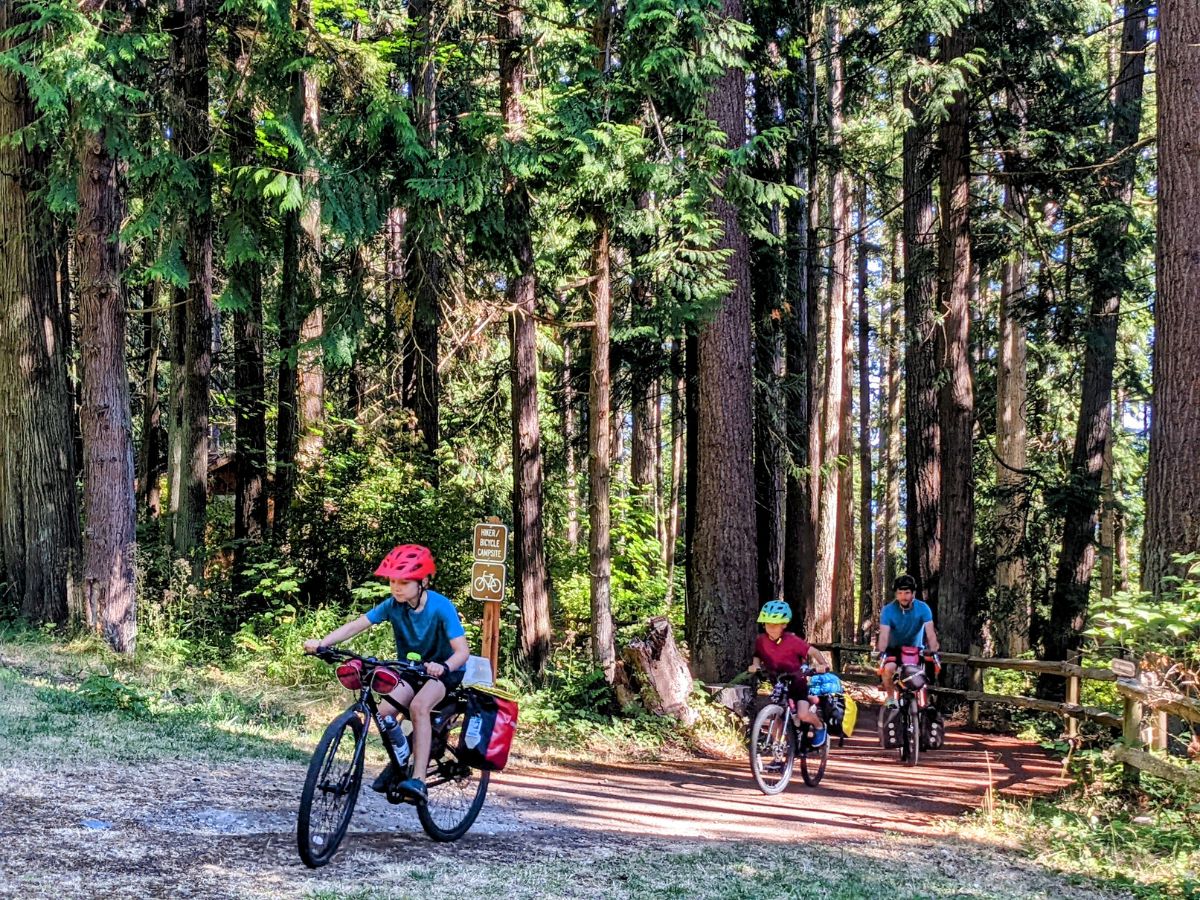
After a few hours, we reached the first of the rail trail. And it was glorious! Riding through the dense forest and along the turquoise Sol-Duc river, it felt quiet and almost magical, like we might see a family of gnomes pop out around any bend.
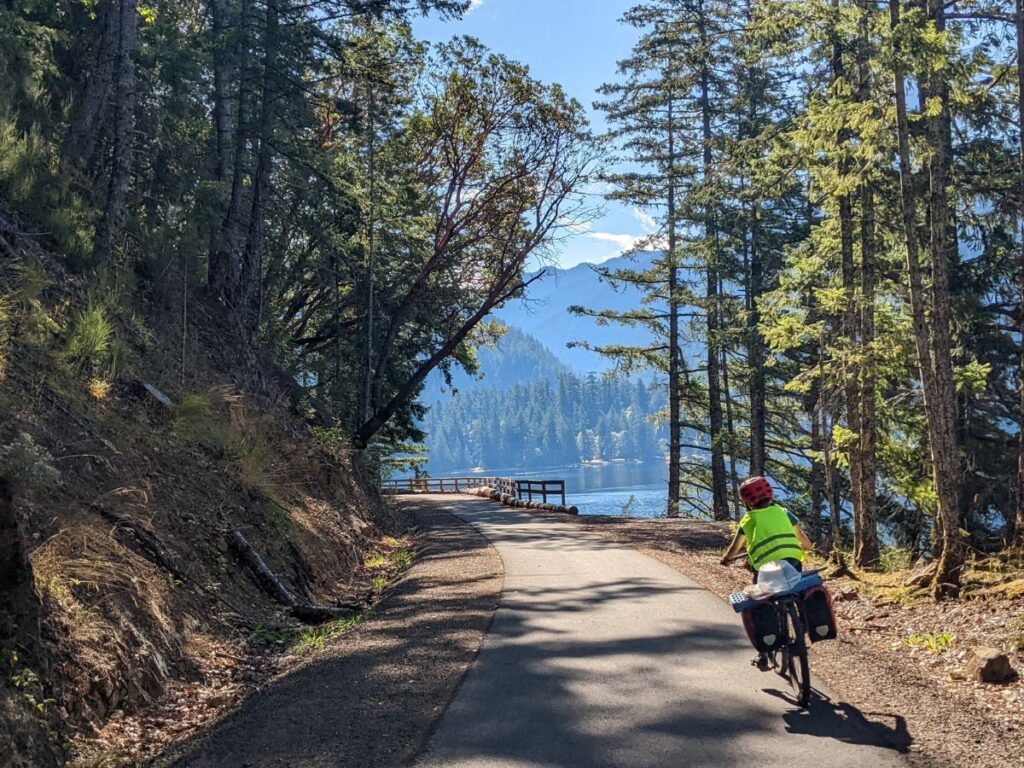
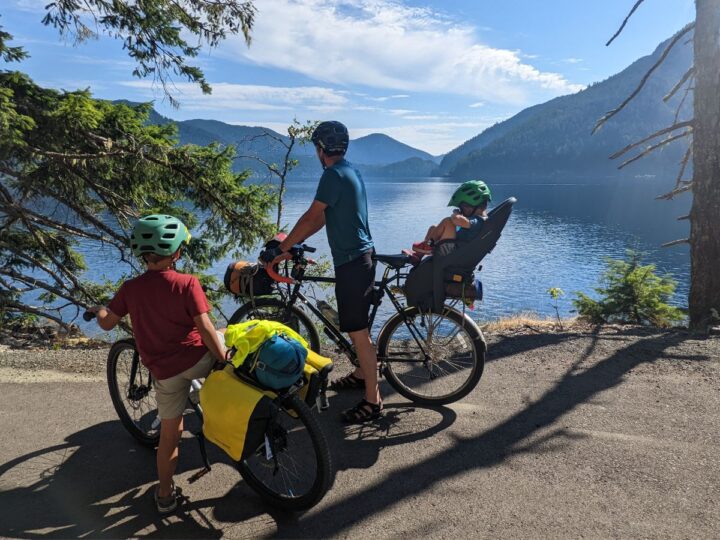
We had bike path all the way to Lake Crescent, a beautiful deep blue lake nestled in forested mountains. We expected to find a store there to buy groceries, but it was basically a little souvenir shop with a few overpriced food items, and only took cash! We got ice cream and hot dogs with the $20 cash we had, deciding to just be happy to camp and swim in such a beautiful spot.
Don’t Miss Lake Crescent on the Olympic Discovery Trail

The next day we biked along the old Spruce railway, which runs right along the Lake Crescent shores. This may have been my favorite section of the trip! The water was such an intense blue, and deep right from the shoreline. It was my swimming hole heaven. We played at the Devil’s Punch bowl, which I’ll be dreaming about for the rest of forever.

From Lake Crescent you can take the Adventure trail, which is a single track mountain bike trail, to connect to the next ODT section, or you can alternatively take either the highway or back roads to get there.
We chose to take back roads to Crescent Beach, since we didn’t have mountain bike set ups and did not want to ride the busy highway. There were some long, steep hills to get up out of the lake, but we were rewarded with a nice long downhill all the way to the coast.
Don’t Forget Veggies!
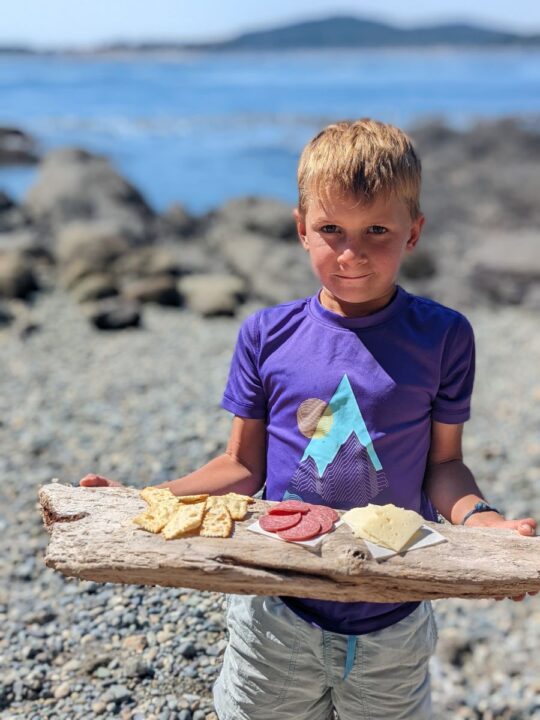
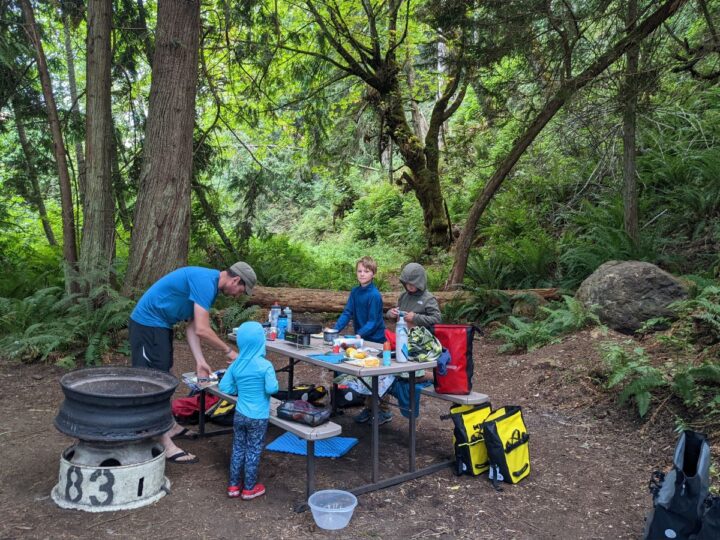
The days continued on like this, with a few highway sections mixed in with bike path/rail trail and back roads. We found mostly hiker/biker sites at state parks, more steep hills on bike paths than we expected, and often failed at planning our food out properly. At one point I realized my kids had barely had anything green in a week, and promptly stocked up on veggies at the next store.
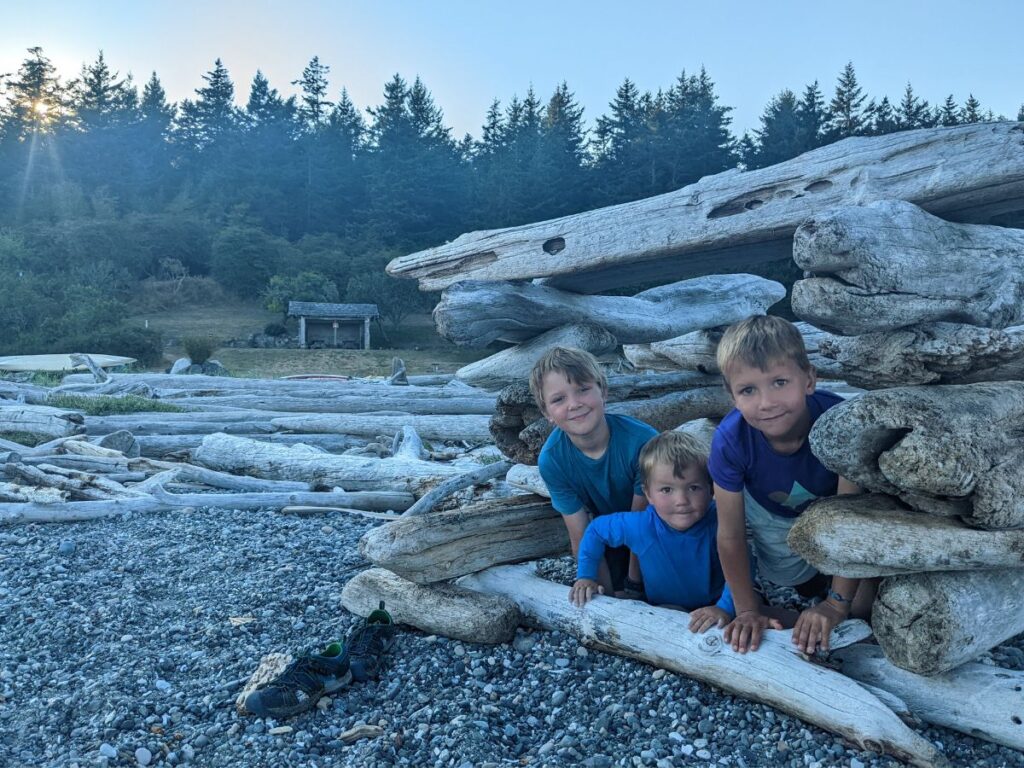
Coast Camping? Cool!
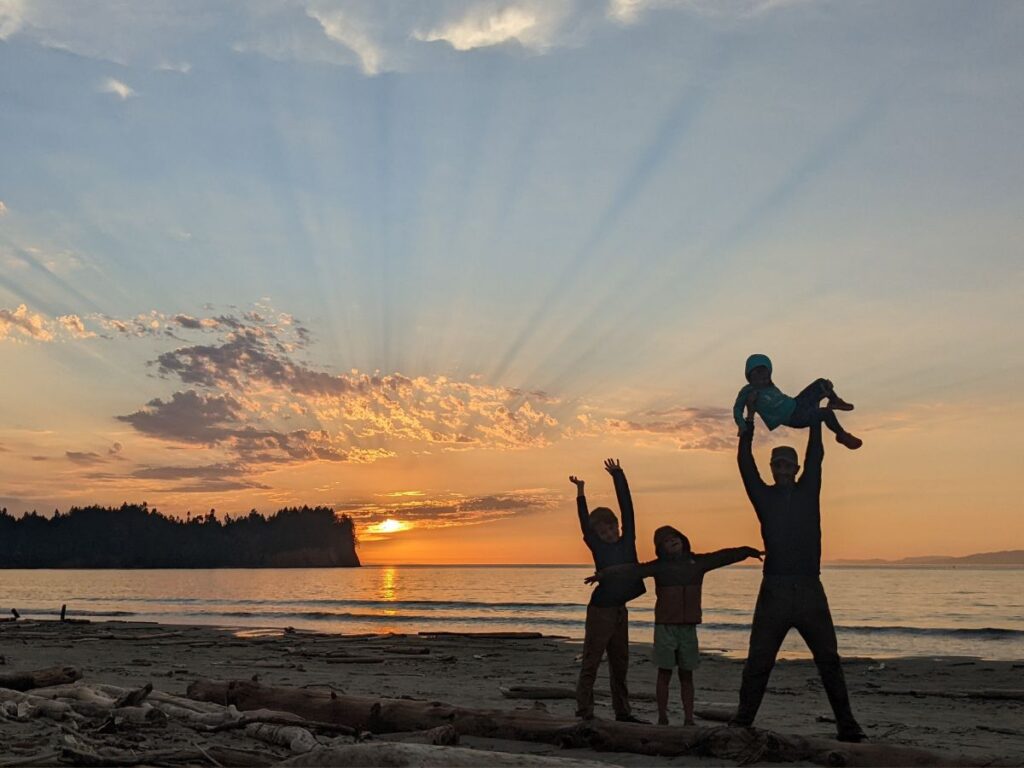
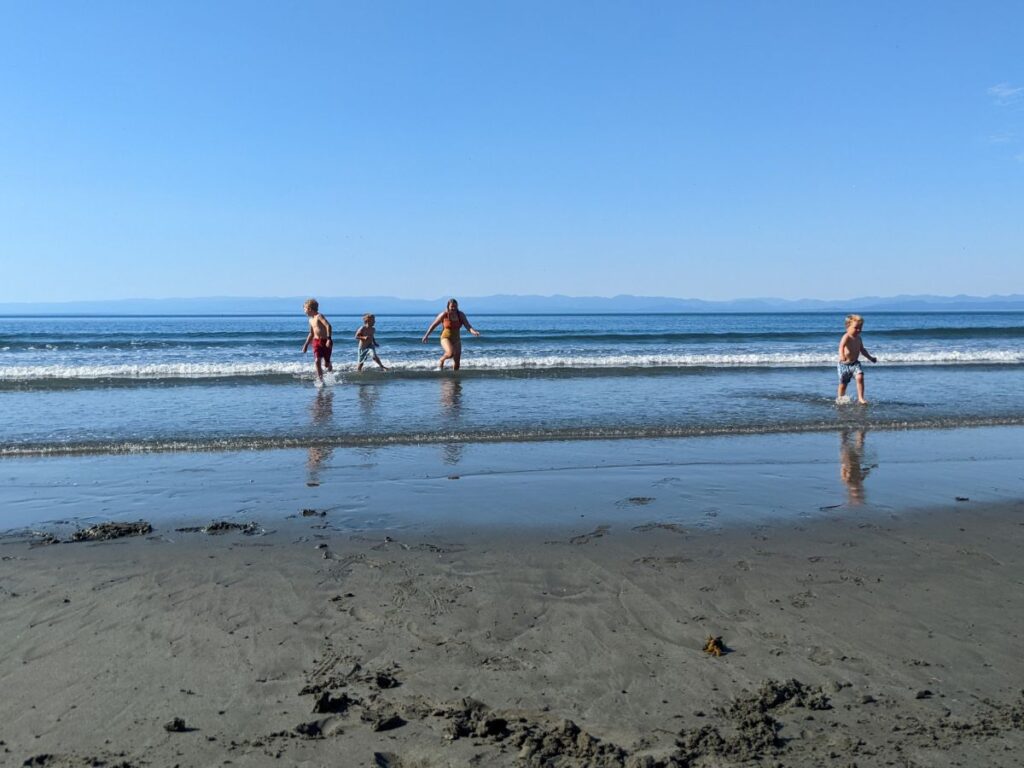
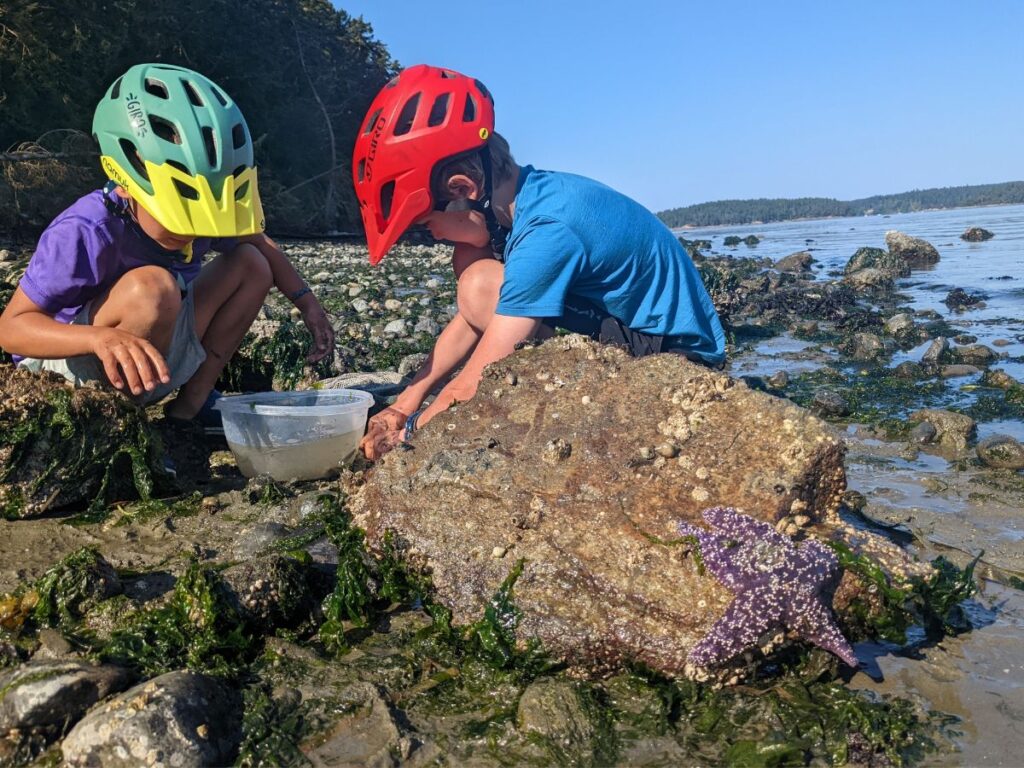
Camping by the ocean was such a treat as well, because my kids were entertained from sun up to sun down, exploring tide pools, driftwood covered beaches, and forested campsites. So many little crabs caught and released, and even one surprising tiny squid found! The beach is my favorite babysitter.
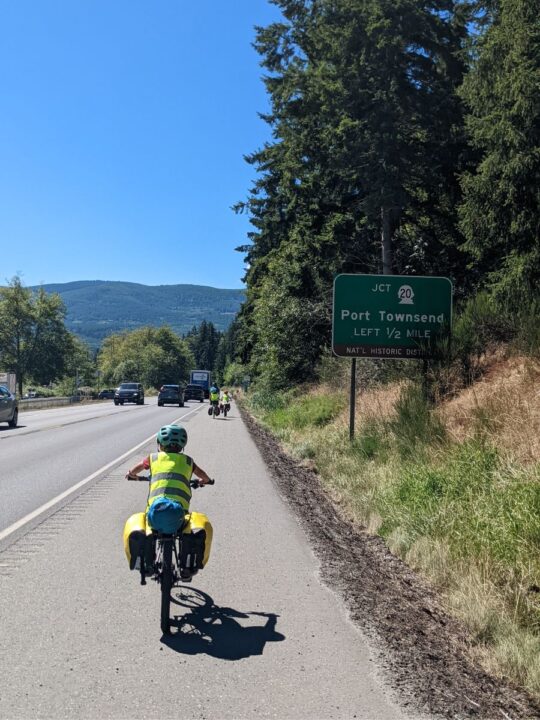
Whidbey and San Juan Island Bike Add-ons

The Olympic Discovery Trail officially ends in the adorable coastal town of Port Townsend, but we planned to keep going to Whidbey Island and the San Juan Islands. We caught a ferry to Whidbey, camped a night there, and biked/bused our way to Anacortes, where we caught a ferry to Lopez Island. Bicycles don’t need reservations to ride the ferry, but you’ll need to know the ferry schedules and arrive early. Here is a helpful website for Washington ferry information.
Whidbey Island
Whidbey Island was riding on the highway shoulder. Parts were quiet and parts were busy. We originally planned to ride from the ferry docks up to Deception Pass State Park and camp, but we didn’t make very good time and ended up camping at Fort Ebey instead. We then hopped on a bus from Oak Harbor to Anacortes, avoiding some narrow and winding roads with the kids and making up some time.
Lopez Island
Lopez Island is typically the most quiet, kid-bike friendly island of the San Juans. We loved it! There were two great beach side campgrounds close to the ferry terminal, as well as quiet country roads, picturesque farms, and a cute little town by the bay. We stayed two nights on that island (one at Odlin park and the other at Spencer Spit State Park). Our day was spent exploring the island by bike and hiking out to Shark Reef Point to see tide pools and seals.
San Juan Island
Next we ferried to Friday Harbor on San Juan Island. Although a much busier tourist town, it was still beautiful. We didn’t have time to ride too far around that island, but we enjoyed the local museums and beaches. I wish we could have explored it a bit more, but the kids started school soon and we had a long drive home, so we ended our tour here, staying just one night with a warm-showers host.
Tips for Bike Touring with Kids on the ODT
Plan Ahead for Food
The first half of the ODT was quite rural and food re-supplies were sparse. We probably should have meal planned/stocked up more in Forks, but you live and learn, right?! Once you reach Port Angeles though, there are many more options closer together. Finding fresh water didn’t seem to be an issue, but maybe bring a purifier just in case. This Steripen is our favorite to tour with.
Helpful Locals Abound
One part of bike touring that I love is how you can see the best sides of humanity while you’re in a quite vulnerable state. People always end up being kind and supportive and so helpful just when we need it.
When we got to the section past Discovery Bay, it is recommended to take the bus for a 6 mile stretch to avoid a very narrow and windy section with lots of blind curves and no shoulder. We planned to do that, but arrived at the bus stop 2.5 hours early, with no great spot to hang out for that long.
I decided while we waited to try and hitch hike. Lucky for us, some kind locals stopped, amazingly with space for us AND our bikes and gear. We were able to avoid the dangerous section and were reminded once again that people are so good.
Cautions on the ODT
As I mentioned earlier, most of the trail is all rail trail/bike path or rural back roads, but there are a few sections connected by busy highway and a section of single track mountain bike trail just past Lake Crescent that took some big hills to avoid.
There is also one 6 mile stretch of road just past Discovery Bay that is notorious for being unsafe, but there is a bus system you can hop on to avoid it. It should also be mentioned that some of the steep downhills should be taken with caution. I’ve heard of some terrible crashes, so make sure your kids know how to descend safely.
Camping and Lodging Along the ODT
We stayed at Lake Crescent, Crescent Bay, Port Angeles, Sequim Bay, and Port Townsend. They all were great as far as hiker biker sites, except for Port Townsend, where we incorrectly assumed there would be a bike campsite, and had to scramble at 7 pm to find a place to stay. Luckily, the cycling community there came through and we were well taken care of by locals (“Warmshowers”, which I’ll explain below).
State Parks
There are several state parks all along the route, most with hiker biker sites available. These are sites reserved for people arriving on foot or bike, and you generally cannot reserve them. They may fill up during busy seasons, but it is rare.
It is a good idea to double check whether these sites exist at each state park because there were a few we assumed had them and did not. Here is a handy website with a list of all the Washington state parks with hiker/biker sites.
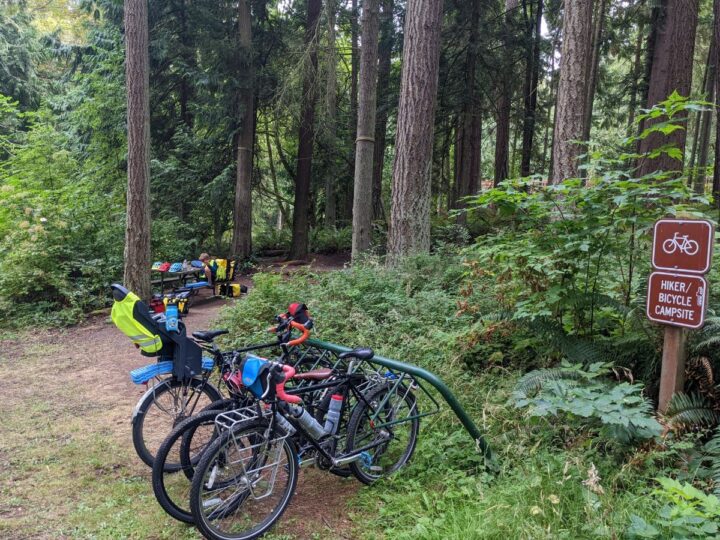
Many Hiker-biker sites provide bike racks and picnic tables
Private Campgrounds and HipCamp
Other options for lodging are private campgrounds (usually more expensive but better amenities), and Hipcamp (where people rent campsites on their private land, similar to Air B&B). There were some cool ones around there, offering a lavender farm, llamas, etc.
Warm Showers Organization for Touring Cyclists
Warmshowers is another organization that can be helpful. It is a hospitality website, and you have to become a member and be willing to return the favor when not touring. It is exclusively for touring cyclists.
For example, when I’m not on a trip, I will make my spare room available to people on a bike tour, to come get a warm shower, a bed if I have one, laundry, and best of all, local advice for their tour. We have had warm showers host save us so many times. And we’ve loved hosting and meeting others as well.
Hotels and Air B&B
Hotels and Air B&Bs are also available, but we only used them as a last resort because they were so pricey and usually almost always full. There are a ton of tourists on the Olympic Peninsula, so it was very difficult to find hotels, both on the ride and the drive to and from.
Food Options Along the ODT

As I mentioned before, planning ahead for meals is important. On the western half of the ODT, there are not many towns or grocery stores, so plan for all your meals up until Port Angeles.
After that, the towns are close to the trail and closer together, so you can rely on eating out or carrying less food. The two options on either end of Lake Crescent for example, were essentially gift shops with limited groceries and did not give us the re-supply we needed.
Bike Touring with Kids Gear Needed
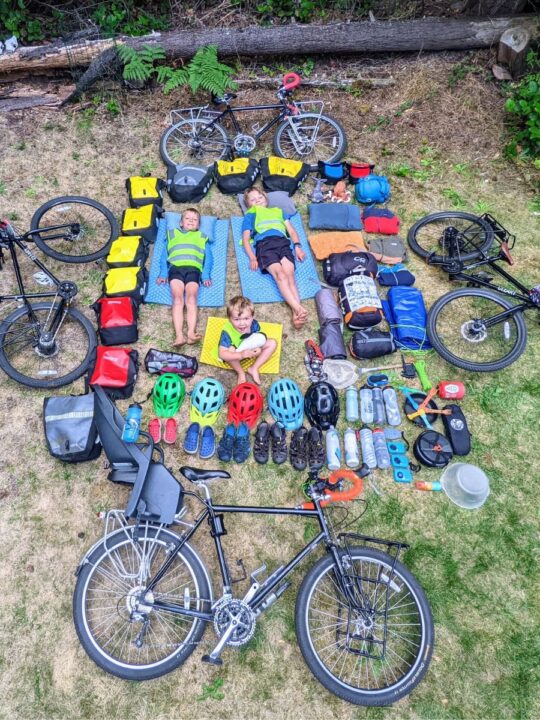
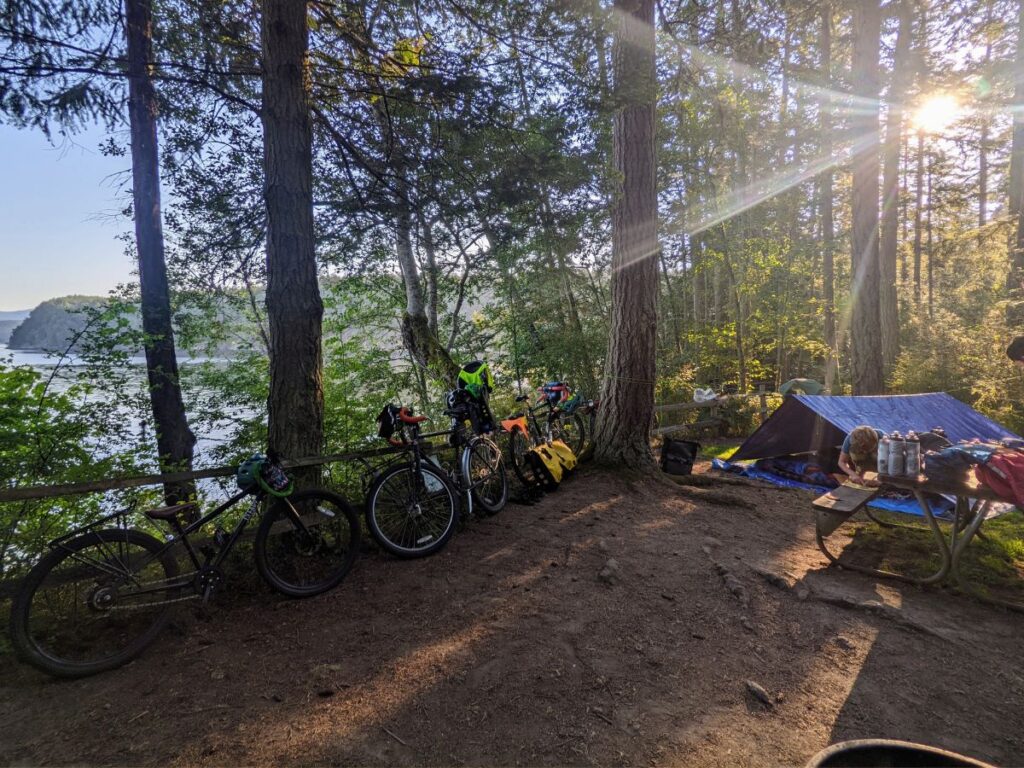
If you plan to do a multi day self supported trip, you’ll need specific gear for that. Generally, backpacking equipment doubles well as bike packing gear. Having a way to carry it is key. We use our trusty Ortleib panniers (bags that attach to a bike rack), or a trailer works too. You can find out more about bike touring and gear in our other article- Bike Touring with kids.
Bike Camping Equipment
Generally you’ll want a shelter (tent, or in our case, tarp and cordage), sleeping bags/pads, a cooking kit/stove, clothing, bike repair kits, spare tubes, food, and water bottles, and bags to carry them all in. Also don’t forget a camera/phone and solar chargers, because you’ll definitely want pictures.
Bike Touring Clothing
We brought minimal clothing, because the weather forecast was sunny and dry for our trip. Merino wool shirts, one short and one long sleeve (I love these from Nui Organics), 2 pair of bike shorts (one that doubles as swim shorts, like the Patagonia Baggies), wool thermals to sleep in, underwear, and thin fleece jackets for chilly mornings. We did pack rain jackets, but never needed them. Our boys brought one pair of shoes each (Keen type sandals) and my husband and I brought our riding shoes (clipless) and flip flops for around camp.
Bikepacking Bikes
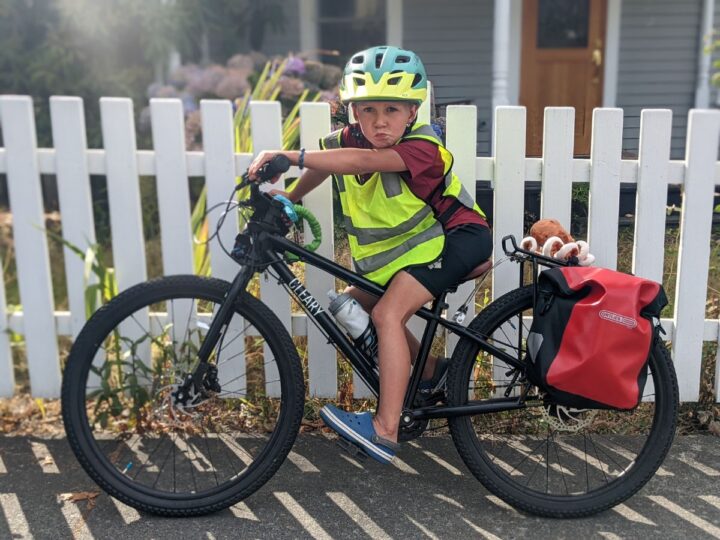
You’ll also want good bikes- ones that can handle carrying extra weight, are comfortable, and reliable. Also, gravel tires are a plus. We ride Surly Long Haul Truckers, and our kids are on Cleary Meerkats, which are steel framed and rack compatible, making them essentially mini touring bikes. Our three year old rode in the Burley Dash seat.
Family Bike Touring Safety
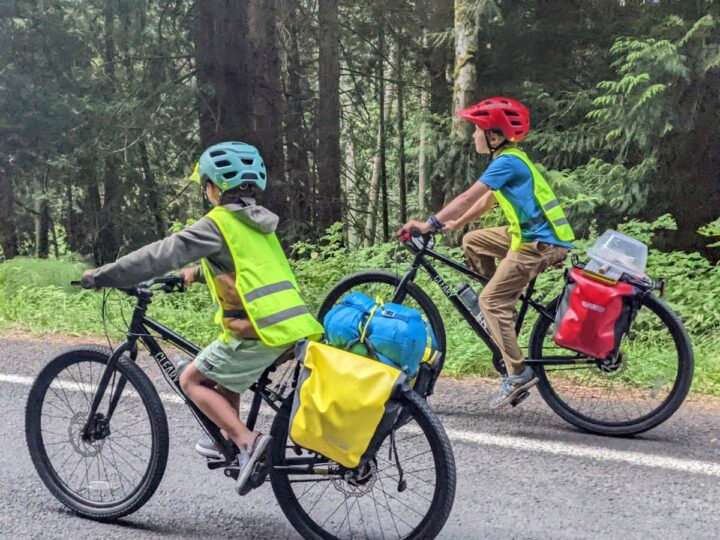
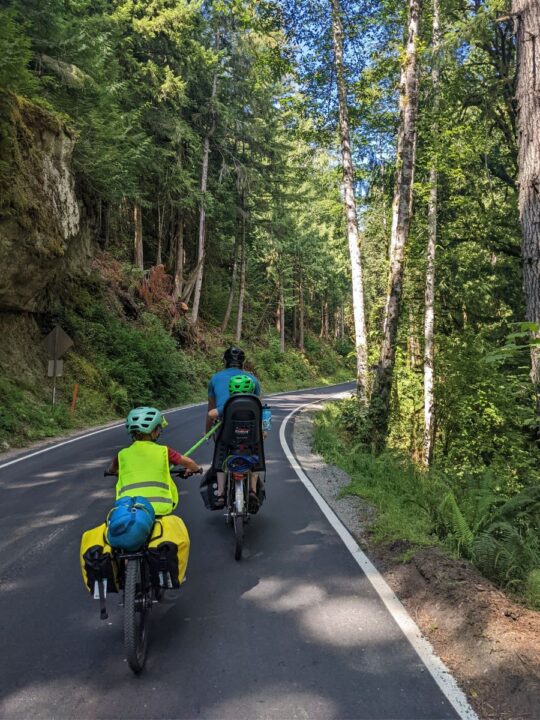
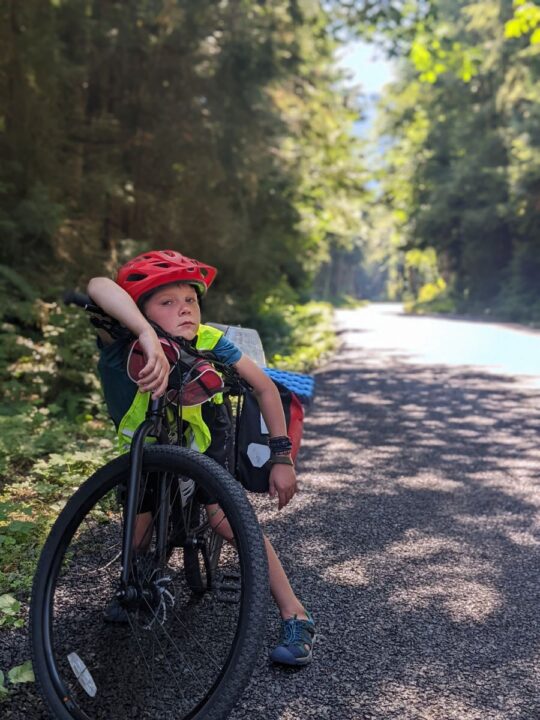
We take safety seriously on our trips. We all had bright yellow vests for visibility, which makes a huge difference for road riding. Obviously we all wore helmets (check out our kids helmet review for recs).
Being prepared for weather and terrain, carrying bear spray, and being able to store food properly are also all parts of bike travelling safety. It was also important to practice riding safely on busy highways (we do adults in front and behind, kids in middle and make sure they are able to control their speed/not swerve).
Know First Aid
First aid knowledge is essential, because you would likely be the first person on the scene if there were an accident. You need to know what to do if something happens. This article on trail first aid is a good place to start. There was definitely not cell service in many parts of this route, but you are usually not too far from the highway if you did need to flag someone down for help. Make sure you carry a well stocked first aid kit.
Worth the Work
While things often didn’t go as planned, and we dealt with a few bike brake issues, lost tempers and very energetic (read: obnoxiously hyper) children, it was an incredible trip. It was amazing to see our kids overcome difficult physical challenges and deal with uncertainty. They impressed us so much, and it brought us closer together as a family.
The adults constantly learned patience- to slow down and notice the small wonders around us, and the kids learned to roll with embracing the unknown and being flexible. It’s generally a great combo.
We enjoyed this trip immensely, and the challenges only made it more memorable and meaningful. It was a highlight of the summer for our kids, who are already begging to go back. We were all sad when it ended. Whether you do all or part of the Olympic Discovery Trail, I hope this helps you feel more confident in giving it a go. Adventure is out there, but it’s up to you to go find it.
Related Articles
Family Bike Touring: The Olympic Discovery Trail
© 2023, Kids Ride Bikes. All rights reserved. Republication, in part or entirety, requires a link back to this original post and permission from the author.