
Bike Ramps for Kids: Best Bike Ramps for Every Level
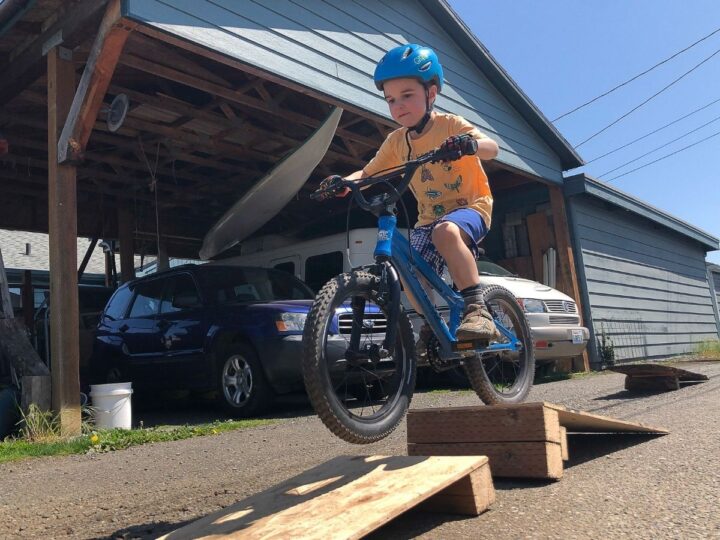
Do you remember the joy of discovering a sketchy wooden ramp tucked away in the woods or an alley? Like a secret waiting to be shared for those willing to look. It didn’t mattered that it wiggled when you hit it and no one asked how many days it had been left in the rain. It was just there begging for attention.
Can you imagine riding up to your favorite park or hang out with a light weight, safe jump ramp? Ramps portable enough to carry like a back pack and small enough to store away in a car or on a garage shelf? They do exist!
As an Amazon Associate and member of other affiliate programs, we earn from qualifying purchases.
Necessity is the Mother of Invention
One of the unexpected yet pleasant gifts of the pandemic has been the explosion of backyard builds, both commercial and DIY with the only obstacle being lack of supplies and space. The innovations that have arisen are impressive.
When the kids couldn’t go out to play, we got creative and looked for ways for kids to still play. Now we can enjoy the fruits of that effort with our friends and family.
Curious about how to teach your kids to jump? This post will help!
- Bike Ramps for Kids: Best Bike Ramps for Every Level
- Which Bike Ramp is Right for Your Family?
- Consider Buying a Manual Trainer First
- Which Jump Should I Buy?
- Quality is Dependent on Materials and Number of Adjustments
- Best Portable Ramps
- Rock Solid Ramps
- Best Beginner Ramps
- DIY Bike Ramp Builds
- Proper Protection is ESSENTIAL
- Related Articles:
Which Bike Ramp is Right for Your Family?
What style of playground you build depends on the interests of your rider, budget and space. In buying or building a ramp, you are giving your kid the blessing (and hopefully skills) to learn to fly.
Teaching Kids to do Dangerous Things Safely
We’ve discussed the benefits of risky play extensively, offering a sound and size appropriate set up is much safer than leaving their safety up to another kid’s understanding of physics and access to scrap wood.
We want to teach kids to do risky things safely. Learning to jump doesn’t have to be dangerous. Understanding progression and the key points of jumping will help set your rider up for success.
Consider Buying a Manual Trainer First
Check out our How to Teach Your Kid to Jump and consider buying a manual trainer before you buy a ramp. Learning to manual (pulling up your front wheel while pedaling) and then bunny hop is very helpful in learning proper body position for jumping. Front wheel lift is essential to ascending and descending tails, drops and jumps.

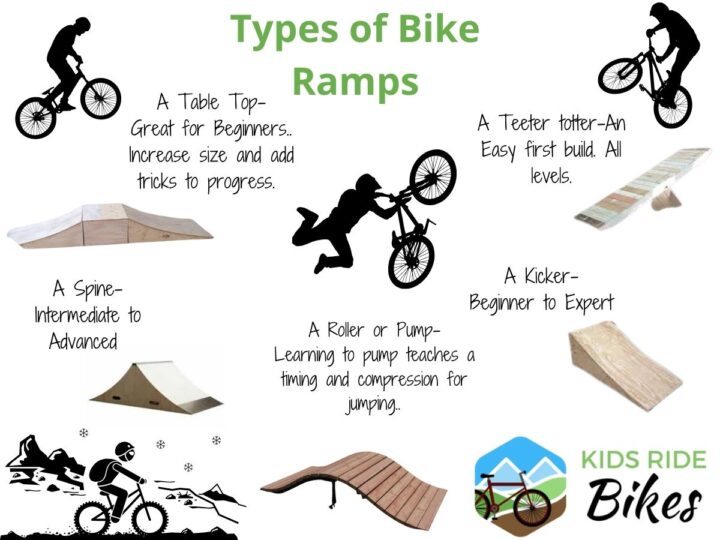
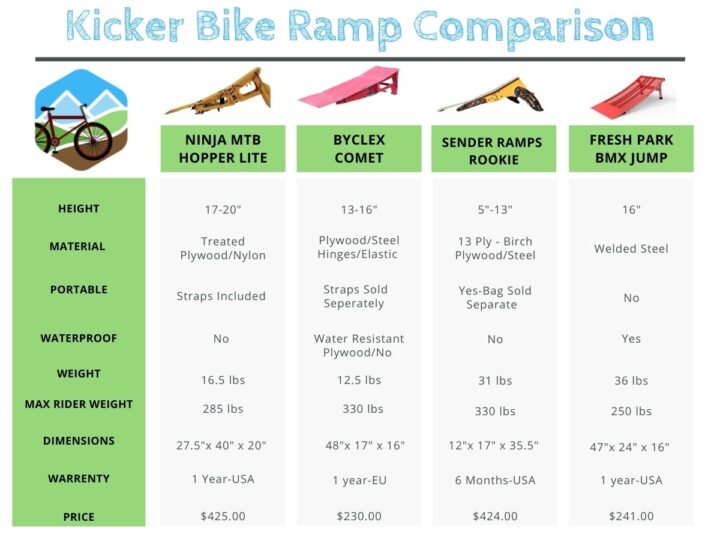
Which Jump Should I Buy?
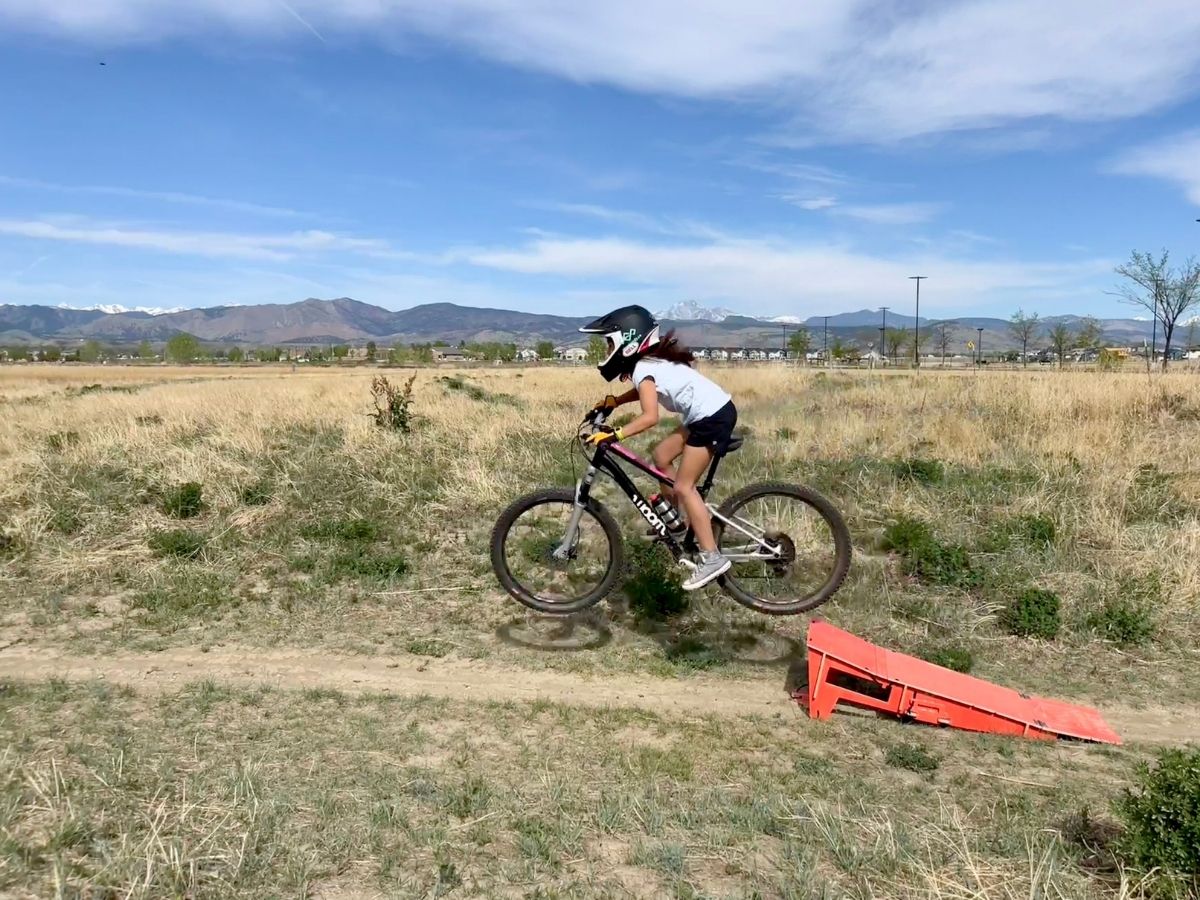
The most common commercial ramp available is called a kicker. This is simple, short upward ramp that gives the rider a flat surface off which to jump.
While kickers can be rolled (simply rolling the wheels over the ramp), table tops are generally considered to be better for beginners. Unfortunately they are harder to find commercially and run more expensive.
Ramps called rollers offer a smoother version of a table top, these are mostly found at bike parks and pump track.
It’s generally recommended to keep a beginner jump 10″ or less. Plastic skate ramps run smaller and are great for balance bikes/new riders but they crack over time.
Not all ramps are created equal, many of the plastic and homebuilt ramps have a straight take off while the higher end ramps have more of a radius that mimics the lip of a natural jump on a trail.
Quality is Dependent on Materials and Number of Adjustments
A nice radius gives the rider more opportunity to practice their stomp upon takeoff which results in a nice rainbow arch. The most expensive ramps let you adjust height and radius.
Materials matter. Plastic cracks. Thin plywood can split and bungee cords can fray. The level of responsibility goes up depending on the quality of the materials, don’t leave them out in the sun and rain. Real wood and hinges are double the weight and cost of their counterparts but they last longer.
Best Portable Ramps
Ninja MTB Performance
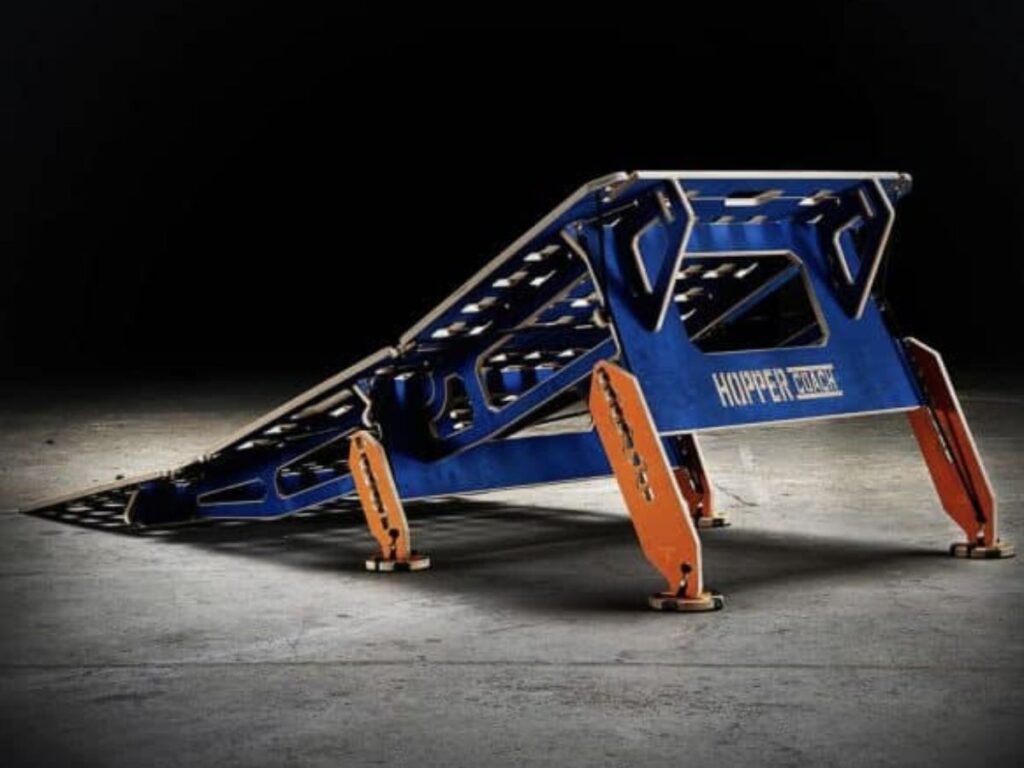
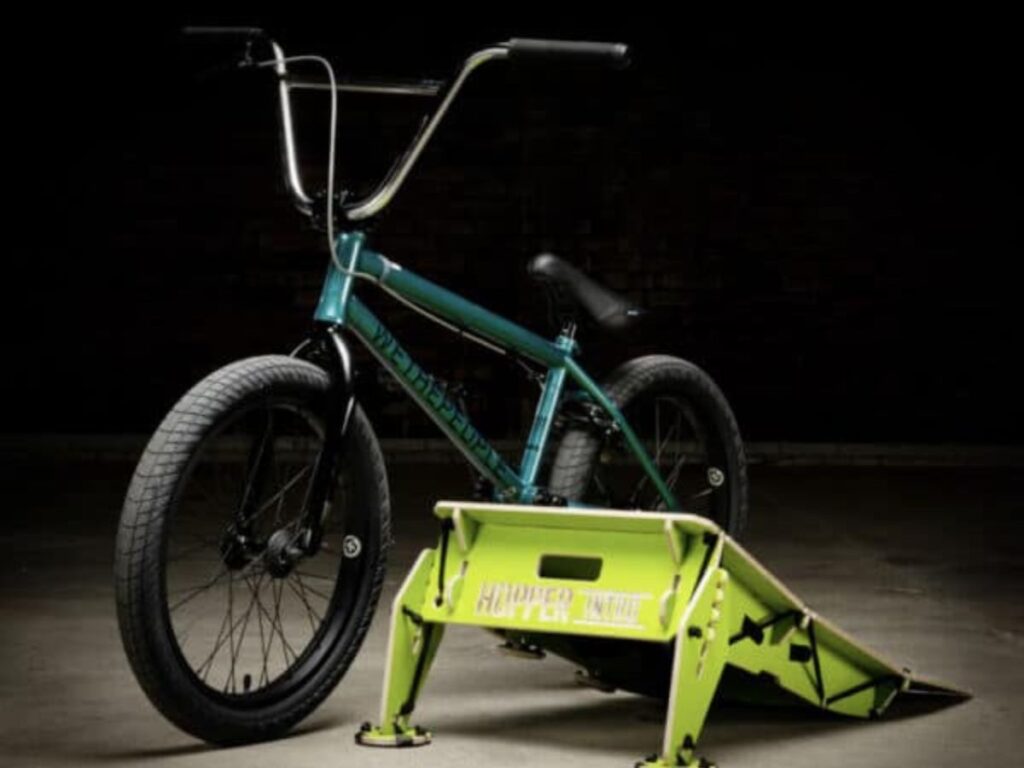
MTB Hopper is the leading manufacturer of modular and portable jumps. Prior to the partnership with Ninja, shipping from Lithuania was pricey and slow.
Ninja MTB Performance is a US based mountain bike coaching company offering camps and clinics that teach the whole family. They have partnered with MTB Hopper to offer US based customer service, shipping and warranty for their branded ramps.
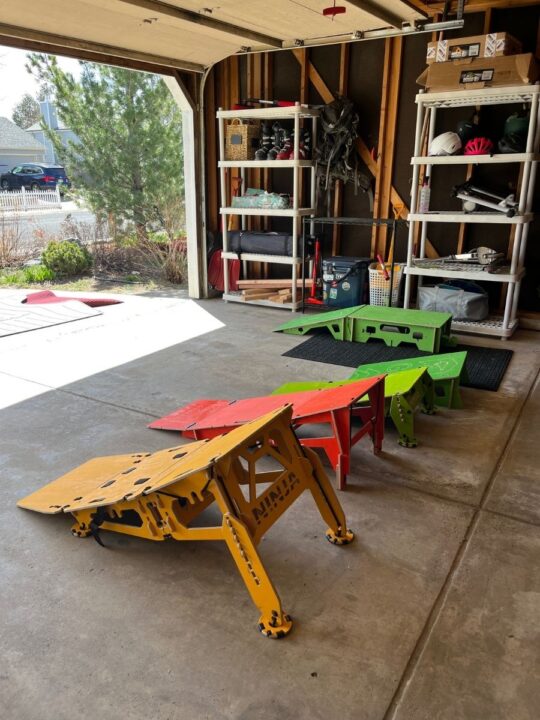
Designed by engineers with a nice lip to practice timing the perfect stomp. Ninja ramps are by far the best we’ve tested due to their minimal weight, durable yet portable components that fold up into a nice compact carrying case and quality construction.
Each ramp has only a few easy to understand numbered pieces that are fairly straight forward to put together and take apart. Movable feet allow their ramps to feel rock solid on difficult surfaces. MTB Hopper makes high quality ramps that are worth the sticker shock. They can be handed down or resold easily for at least half their price.
We tested three of their kickers; The Intro, The Lite and The Coach. Check out our detailed review of each ramp.
Byclex Ramps
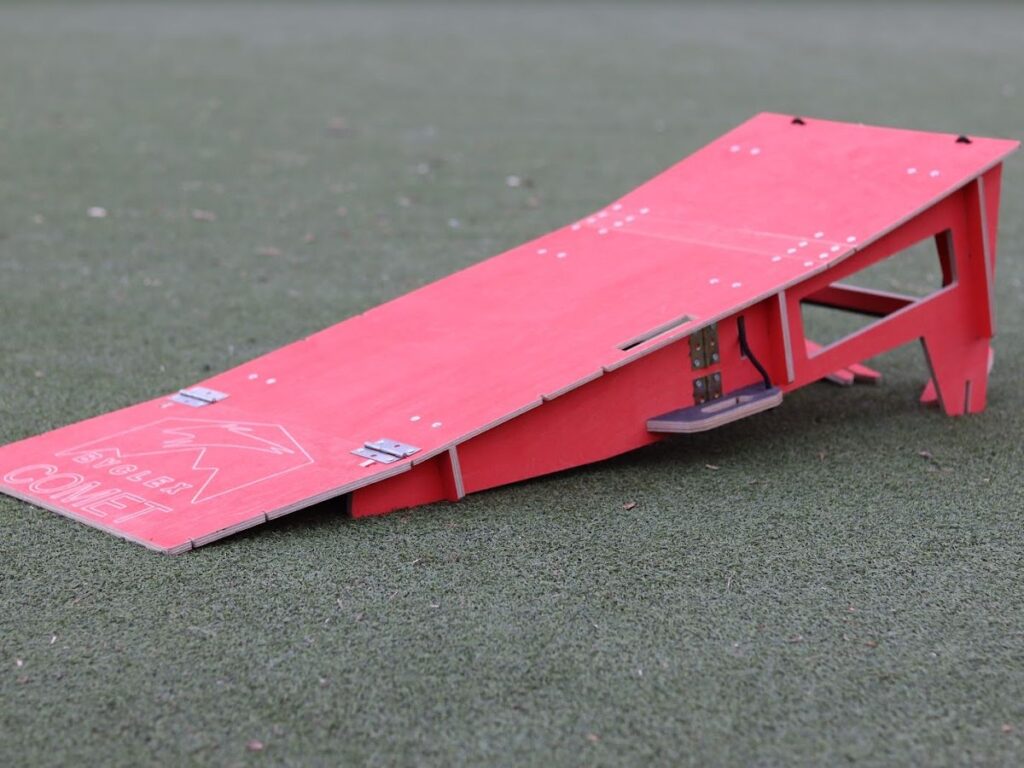
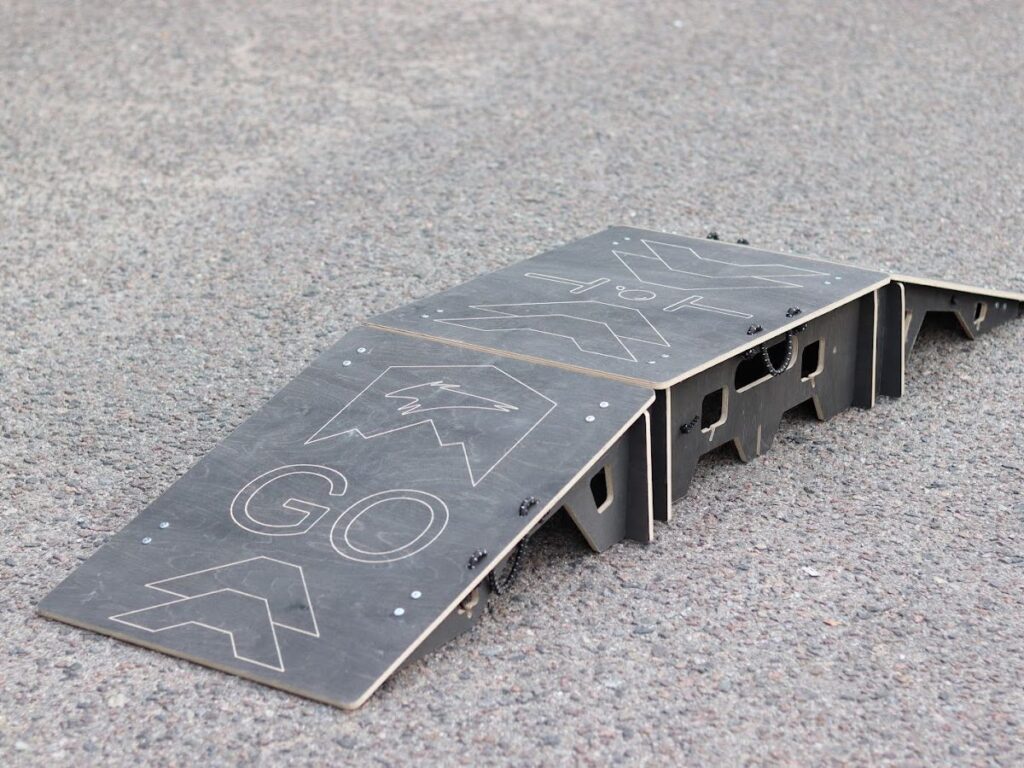
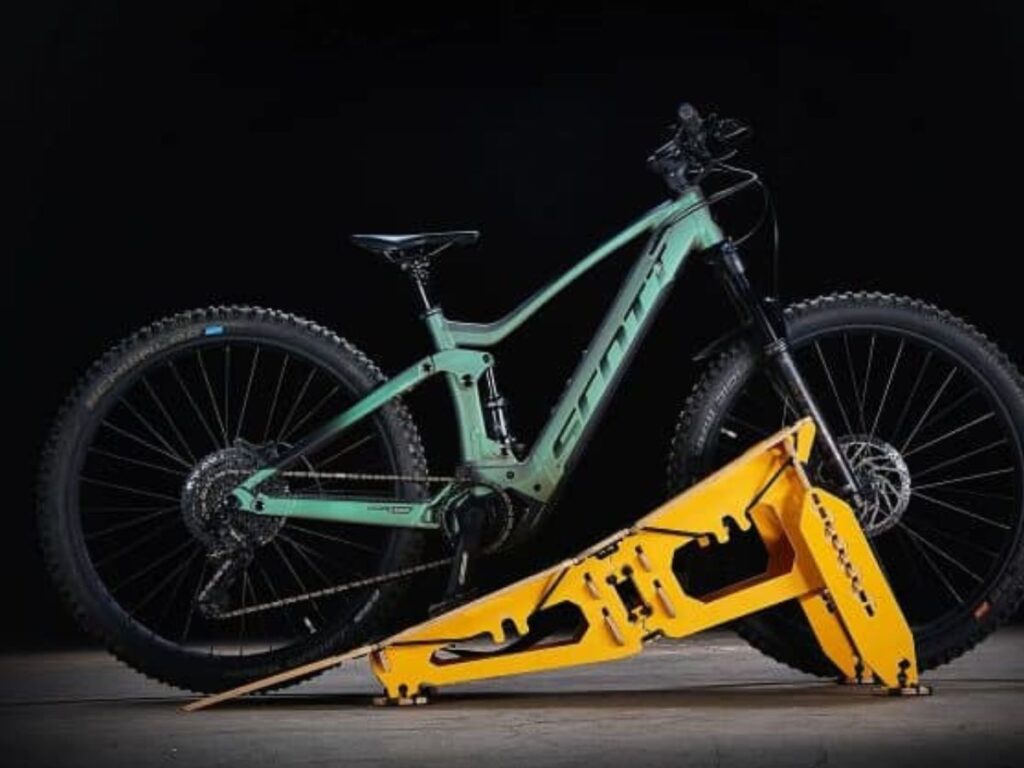
We had the pleasure of reviewing two of Byclex Ramps. They have a huge offering of various sized ramps, table tops, a root run, a spine and even a “Hopp’o’meter!” These ramps are well built, durable and feather lite. The design is straight forward, clean and easy to put up/break down.
We tested The Comet (great for beginner/intermediate) and their GO Table Top Bundle which was by far the preferred ramp for beginners. This was by far the preferred ramp during testing and a great value for a 3 pieces.
Byclex has a great product but the return policy is rough. You have 14 days to ship it back to Lithuania at your own cost and in must be “unused and in the original packaging.” I’m unsure how you can decide if you want the product without being allowed to try it.
They do have a one year warranty on broken or faulty parts. Sender Ramps sells a cross barrier similar to the “hopp’o’meter,” but their version is much pricier. Byclex is able to keep prices down with simple yet effective designs.
They don’t offer as many modifications or flex but they are durable and safe. I believe they are worth the shipping hassle and return gamble. See our full review here.
Not comfortable flying off plywood and bungee cords? Check out the ramps below.
Rock Solid Ramps
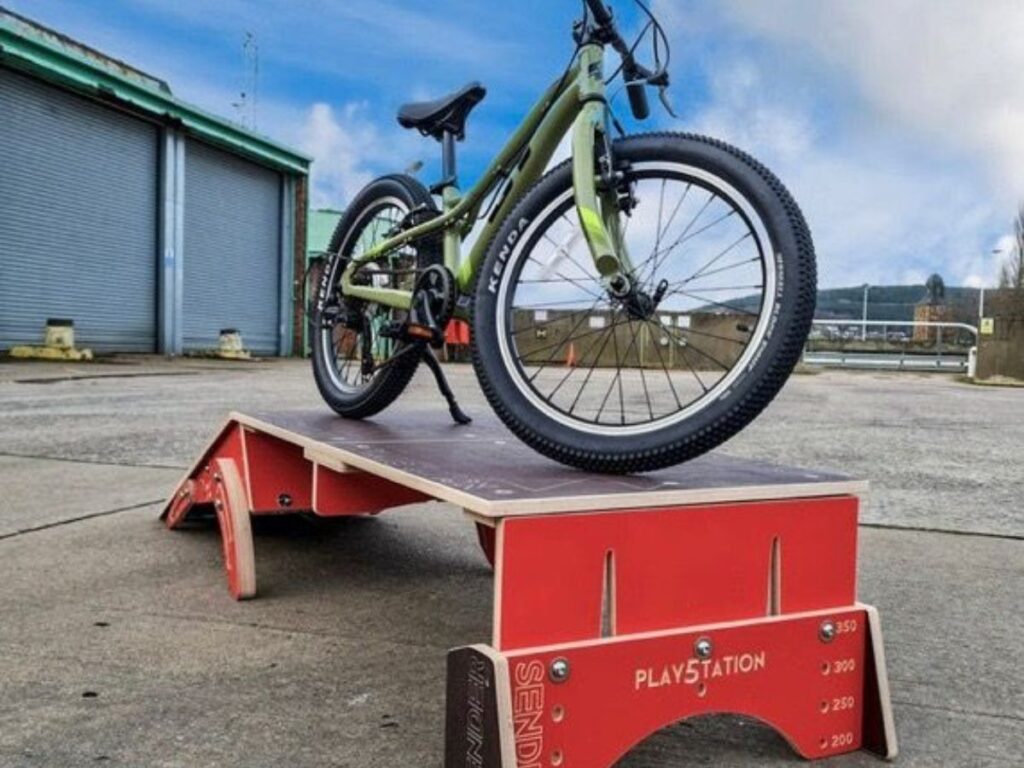
Sender Ramps
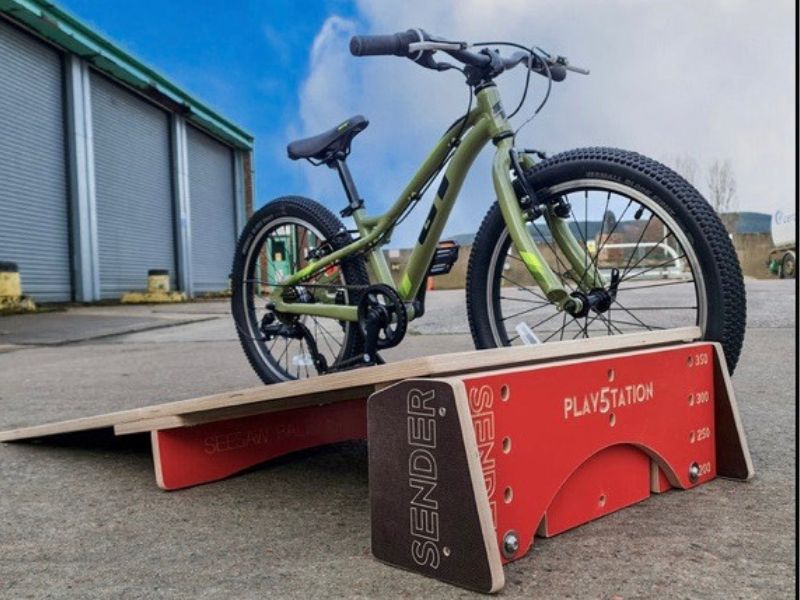

Owner Scott Muir, a Scottish pro rock climber transitioned to building climbing walls in his retirement. His kids fell in love with cycling and he began building them ramps with the spare wood left over from building climbing walls.
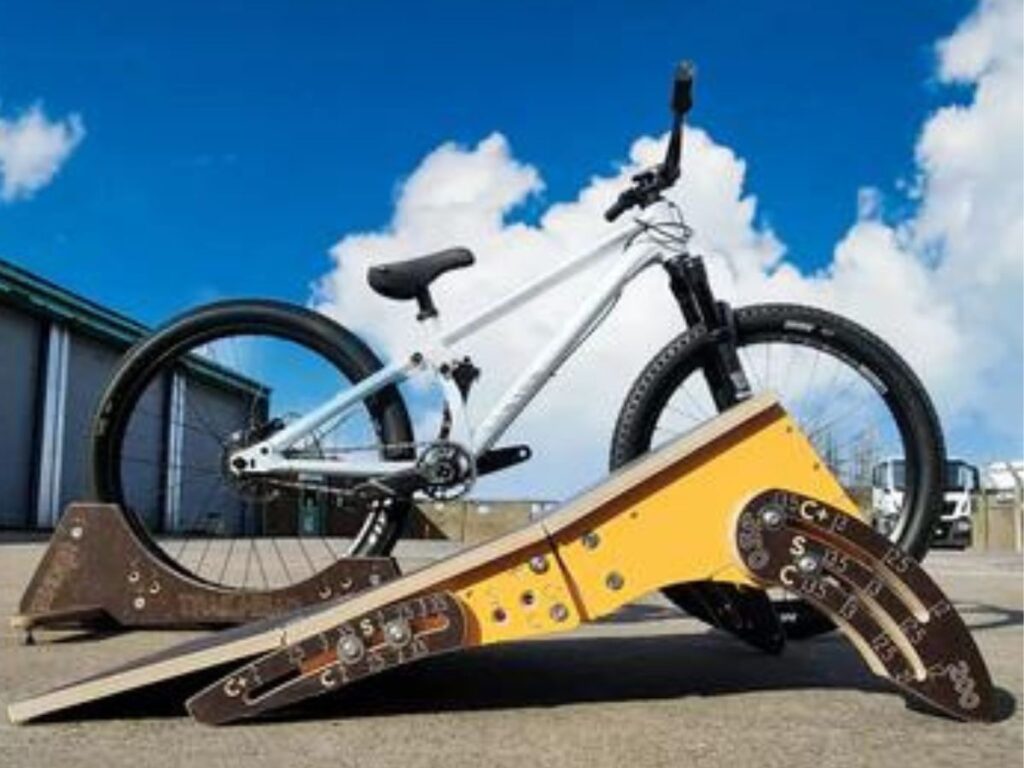
Fast forward 5 years and Sender Ramps has unequivocally created the most customizable, durable and biggest line of ramps on the market. They are fully customizable and the best part, no elastic or plastic. They even come with coated grip surfaces.
What sets Sender Ramps above the rest is just how much a ramp can be customized to fit the progression of a rider. Not only can the height of the jump adjust but amount of curve can be adjusted as well. There are three settings: Straight, Curved and Curved + or as they say, “Flat, Sweet, Steep.”
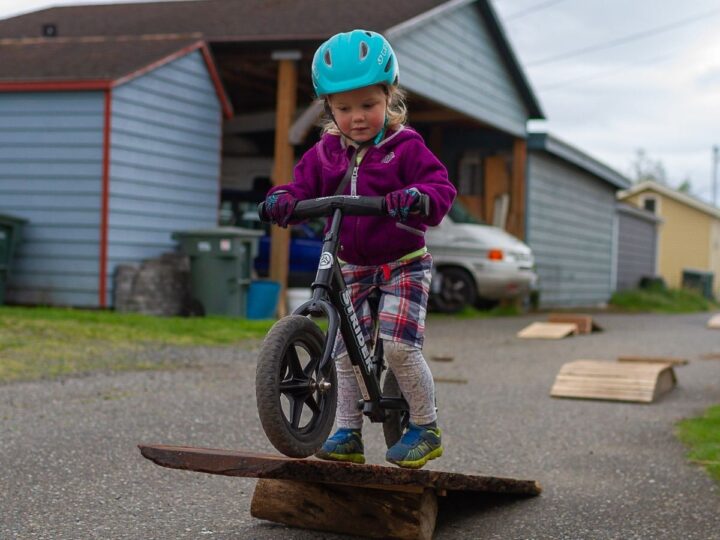
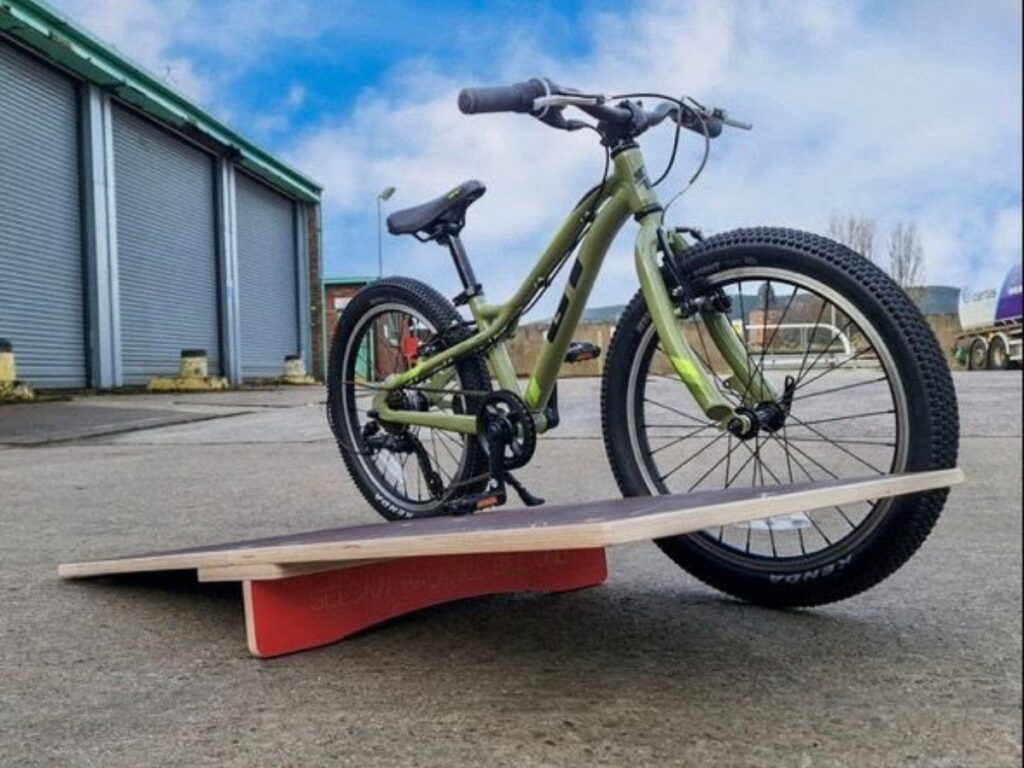
Beginner riders start with a straight ramp and then the curve is added when a rider is ready to practice stomping. Sender’s Skills Station is a is a great starter set up for all younger riders on 16″ – 24″ wheels and Balance Bikes!
It can be anything from a tiny teeter-totter to a spine for a little roll over. You can also mix and match, like adding another kicker to the Skills Station to make a small drop.
Mike Lawless runs their North American headquarters out of Washington. Shipping, customer service and events are all now local which is great because they are all about giving riders the skill set to safely send jumps.
With a rather abundant offering, each ramp or feature is designed to teach a rider a specific set of skills. Even their limbo set uses some fun to teach bike/body separation as well as balance and timing.
Sender Ramps has been super cool to offer us a 10% discount with code: KRB10
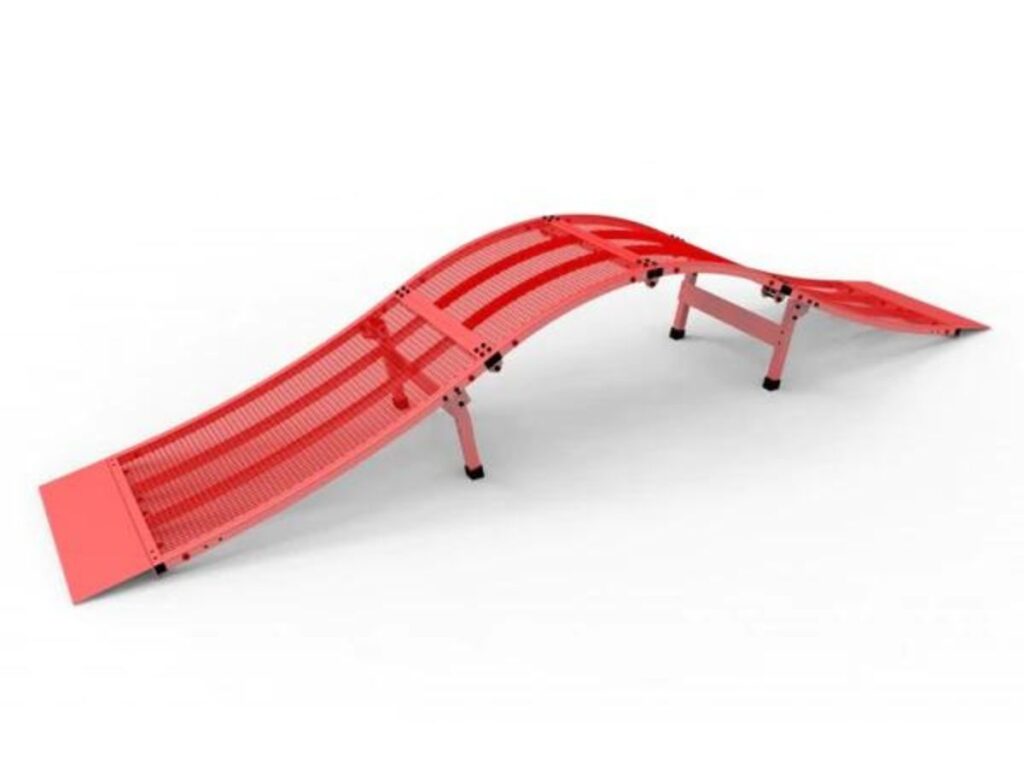
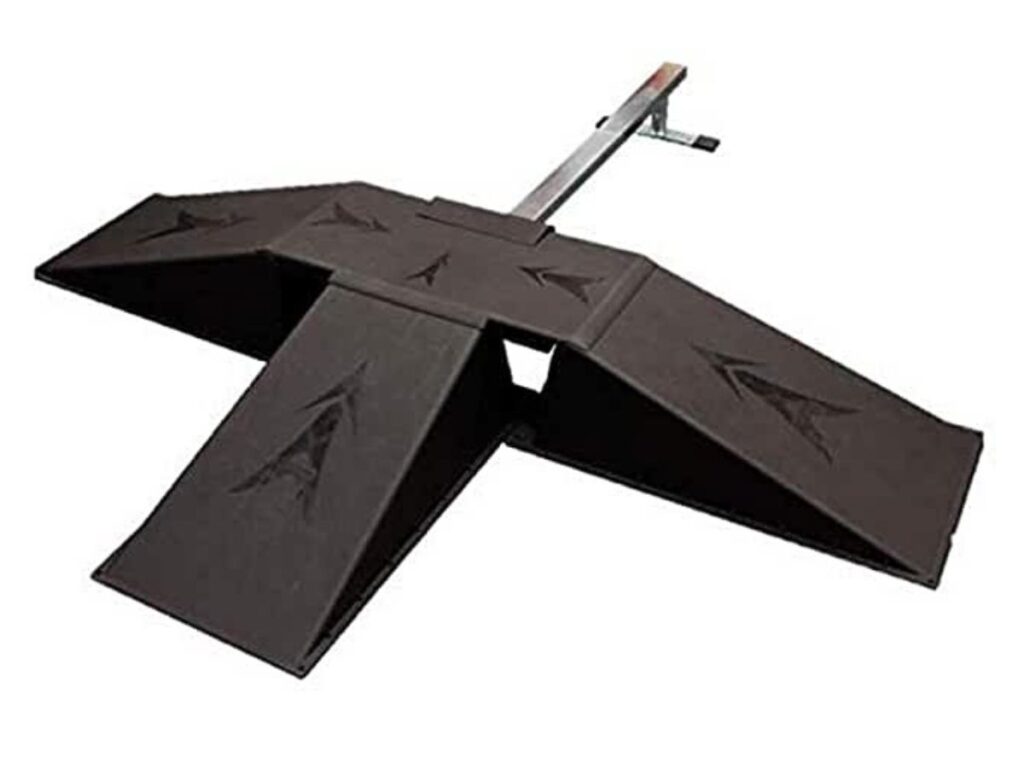
Fresh Park Ramps
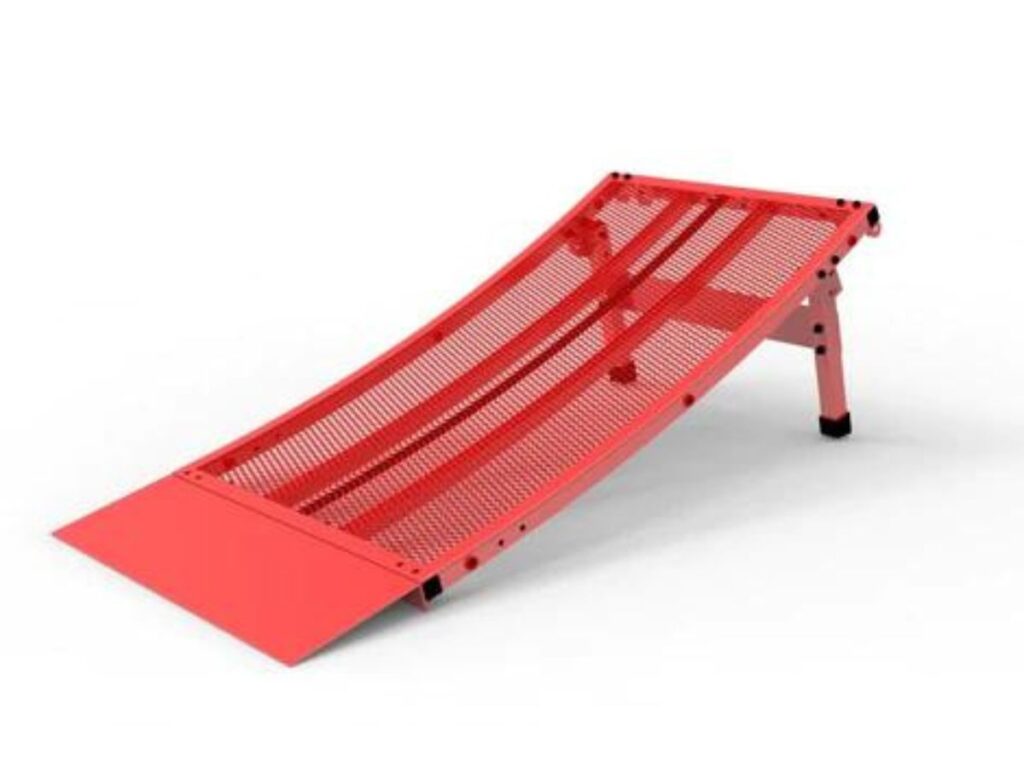
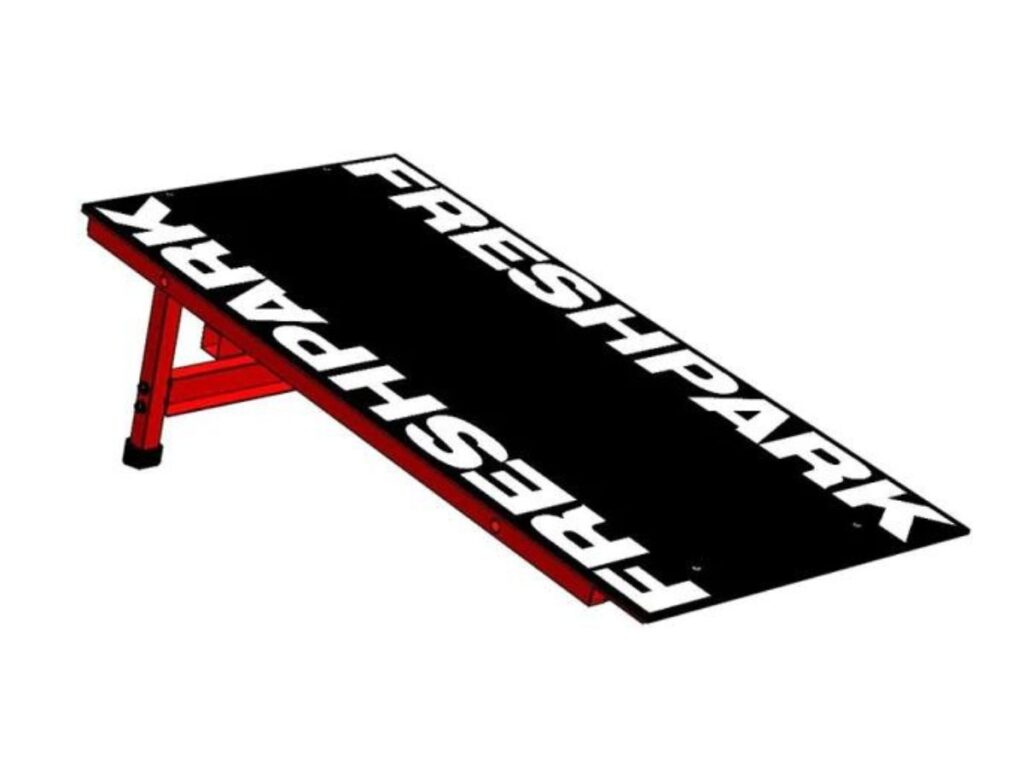
Do you have the space to set up a more permanent park?
Fresh Park is a US company out of Huntington Beach building metal ramps originally for skaters. Fresh Park now builds motocross and BMX (street and racing) ramps that aren’t crazy expensive for their size and material.
From quarter pipes to rollers, the options are tantalizing if you have the dough. Kits can be customizable a spine can be switched to a roller. They are built to be weather proof but they don’t dissemble easily. They are a solid investment if you kid enjoys riding BMX. Kids can branch out learning to ride rails and practice their race starts.
Unfortunately these ramps aren’t adjustable but they do work together and pieces can be added or subtracted for variations.
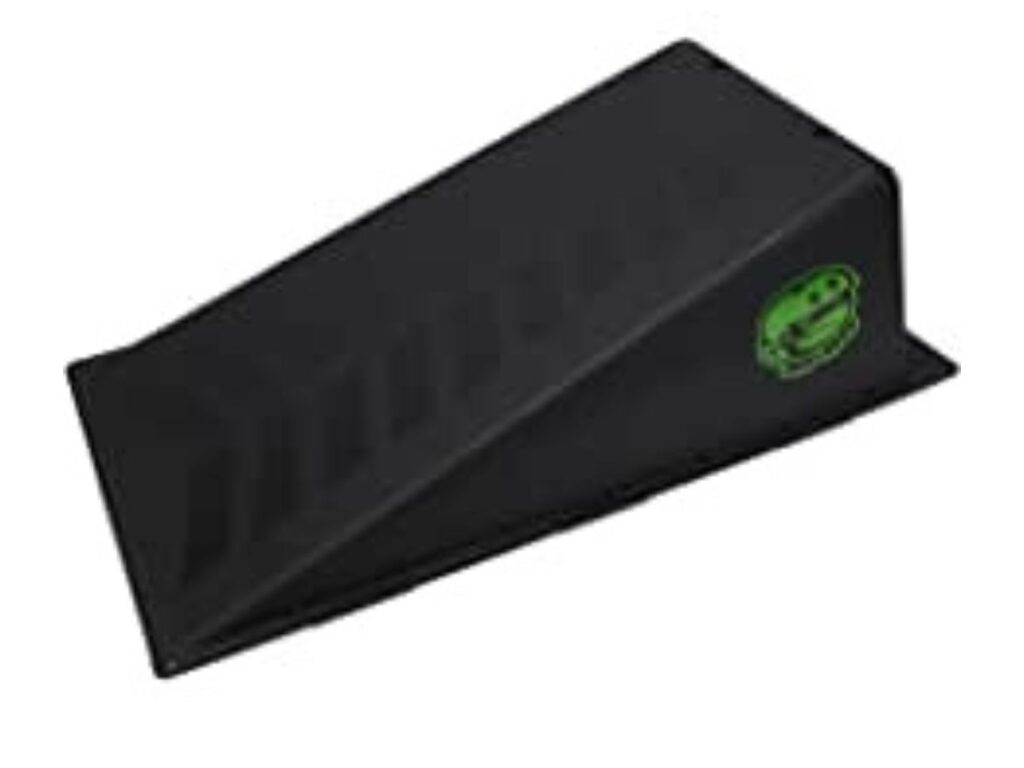
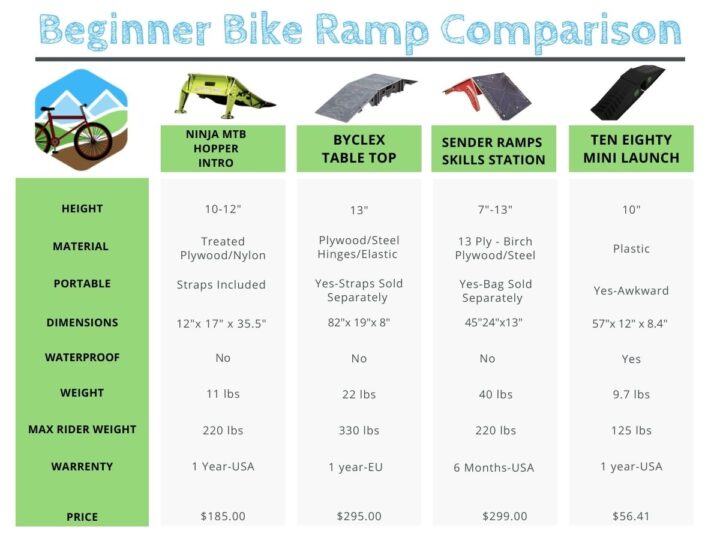
Best Beginner Ramps
I hate to say it but the best beginner ramps I’ve found have been cheap plastic skate ramps. They are just small enough to entice even the most timid rider. That said, they crack over time and the plastic is weakened by long periods in the sun.
Look for natural drops (down the curb) or small lips/hills around town. Check out skate parks for small features to jump off.
Ten Eighty Ramps
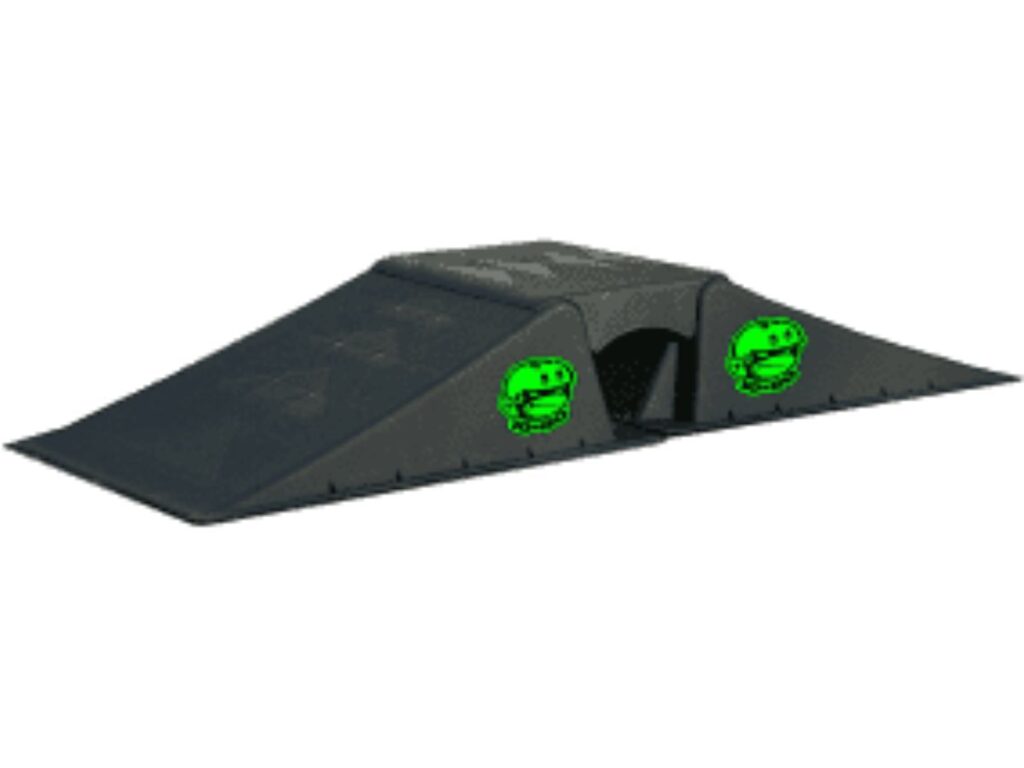
This is the most common plastic skate ramp around. It’s better than the unbranded ones but don’t look for customer service. I tried fairly hard to find a contact for this company and failed.
That said, cheap plastic ramps gets the job done. I’ve found a few over the years second hand. They are well loved and easy to pass on (until they’re unsafe). I’ve even found a little table top used for $10.
The Table Top, the Mini Launch, and a 40″ grind rail can be added for the Skatepark Set.
DIY Bike Ramp Builds
Are you handy with a saw? Be that hero. Build the set-up to help your kids take their skills to the next level. Even better, build it together. There’s a certain magic in building together and that energy stays in the ramp as good juju each time you hit it.
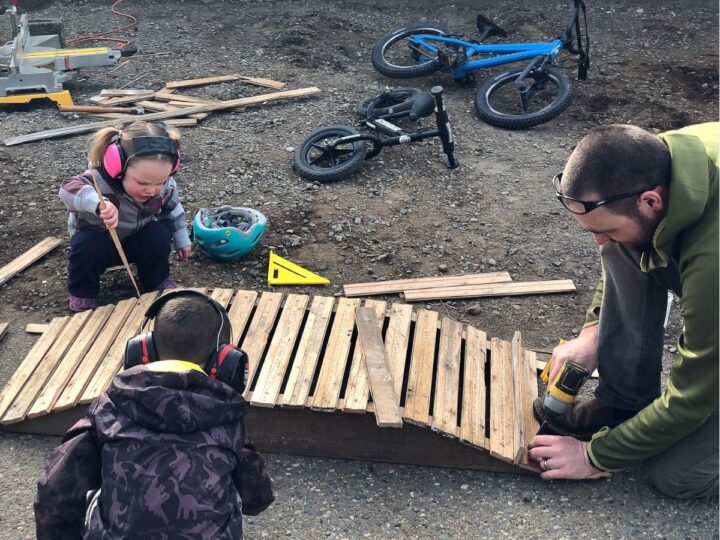
Which set up you want depends on what your kid enjoys doing. Some like trying tricks off wedges and quarter pipes BMX style while others want to clear table tops on mountain bikes in order to master them on the trail.
Seth’s Bike Hacks does a great DIY kicker tutorial and a DIY roller tutorial. A simple google search will reveal several options. We suggest keeping kickers small while you or your rider learn proper body position and stomping.
Skinny Bike Ramp
Skinny’s are the easiest feature to build, just have your kid follow a painted/chalk line on the ground. Learning to stay right on the line for 6/8 feet is the first step to learning to ride a skinny.
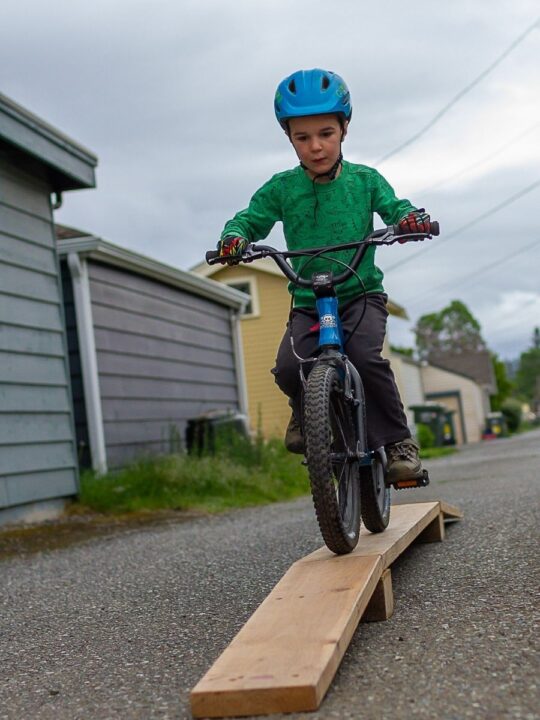
Finding a skinny can be easy as looking for a downed tree or nailing together some scrape wood to make a long plank. Start by placing a 2×8 directly on the ground. Once a kid can ride the whole thing without falling, raise it a few inches off the ground by adding some 2×4’s.
Over time your rider will practice balance and how to shift your body position/weight around while not falling.
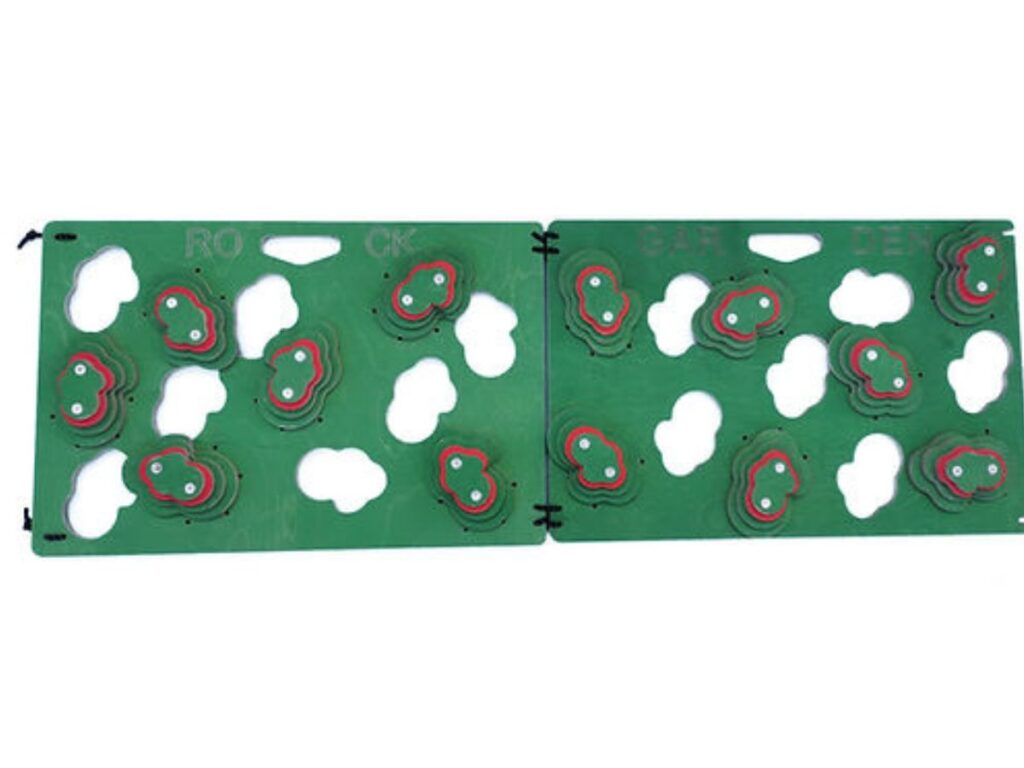
Rock Garden Bike Ramp
Initially I thought this was a silly idea but when I looked it up I was impressed. If your kid needs to learn to pedal hard through the bumps then either have the ride over small sanded bits of thin scrapes or 2×2’s or pebbles/small rocks hot glued to a large piece of plywood.
Increase obstacle size as confidence increases. Initially it’s about getting kids to pedal through, then it’s about teaching the how to maneuver their front and eventually back wheel around large obstacles while shifting body position. Climbing holds drilled to plywood make an advanced version this feature.
A good drill to work on wheel placement is to have kids turn in-between a line of cones. First have them push both wheels around the cone, then have them spit the front and back wheel between the cones. Learning to move the back wheel out of line with the front wheel is essential for managing super rocky bits on the trail.
Byclex has a affordable and portable rock garden as well as a root run that even comes with straps. While Sender Ramps did have a much more expensive offer but they seem to have stopped selling it.
Teeter Totter
Teeter Totters are a great feature for younger riders as long as the width is large enough. They promote balance as well as timing. The more skilled the rider, the smaller the width of the ramp.

Where Should We Jump?
Learning where to set-up your new ramp is just as much a learning curve as to how to jump. Think soft landings. You may need cement to get some speed but grass is your best landing.
Use natural features to practice landing on a decline. Put the ramp next to high curb to create a table top. I’ve seen kids use ramps for side hits, gap jumps and more. The possibilities are endless. Start slow and easy in an open field and then start looking for features around you.
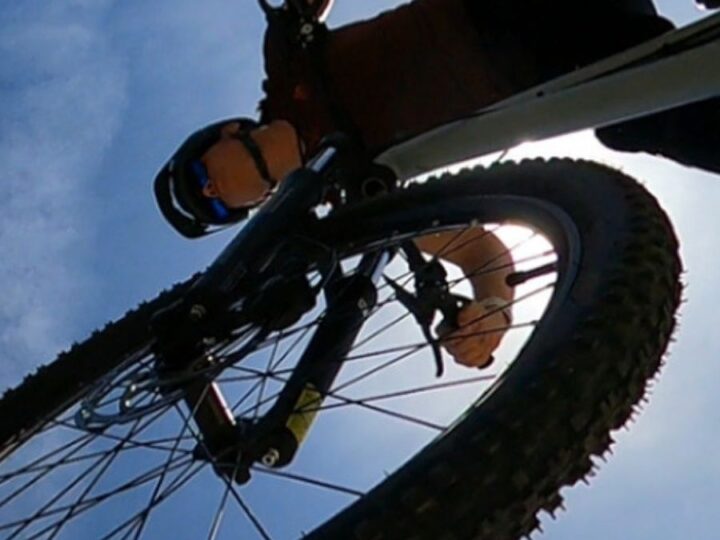
Monkey see. Monkey do. Ramps aren’t just for kids! Get out there and have a go yourself. A solid attack position is essential for rolling any jump smoothly.
Proper Protection is ESSENTIAL
Helmets are non-negotiable-don’t ride without one. Here’s a list of our recommendations. Kids heads are shaped very different, the best one is the one that fits properly. It’s cheap and easy to prevent bloody hands. See our favorite biking gloves for kids here.
Body armor is becoming increasingly popular and now comes in lightweight breathable materials. Finding a set of pads your rider feels comfortable in is similar to trying on helmets. Kids won’t wear pads that aren’t comfortable.
Our team has had success with G-Form, 7iDP Transition, Fox Peewee Racing, Leatt, IXS Carve Series and Pocito for our littlest daredevils. Check out our post on Bike Safety for the team’s thoughts on them!
As jumping height increases, please be sure to increase protection. Full face helmets, neck braces, chest protectors, padded shorts, shin guards and even full armor jackets are all a good idea depending on the speed, height and terrain.
We can’t wait to hear which set-up have worked for your family. Tag @kids_ride_bikes to show us your skills!
Related Articles:
- Best Bike Helmets for Kids in 2022
- Ninja MTB Ramp Review
- Byclex Bike Ramp Review
- Mountain Biking with Kids
- How to Jump a Bike
© 2022, Kids Ride Bikes. All rights reserved. Republication, in part or entirety, requires a link back to this original post and permission from the author.
Hi
My Parish Council is looking to extend its beginners BMX bike track and wants to access permanently install a few jumps / pumps. Can you advise of a good provider?