Teach a Child to Pedal a Bike
One of THE most common biking-related questions we receive here is how to teach a child to pedal a bike…and why your kid is struggling with it!
Our team has gathered our best tips AND best stories, because we’re in this together.
Spoiler – not ALL kids learn to pedal easily! And that’s ok.
This post may contain affiliate links. As an Amazon Associate and member of other affiliate programs, if you purchase something through one of these links and use the discount codes provided, we may earn an affiliate commission at no cost to you.
All products and brands recommended are hand selected by our team, so thank you for supporting us by clicking through!
How to Teach a Kid to Pedal a Bike
To start, you’ll find our best advice for teaching a child to pedal for the first time…AND how to foster a life-long love of biking.
Again, let us make it very clear that every kid is different. If your child struggles with pedaling, it does not mean anything is wrong with your child OR you.
Before the Pedals, Start With a Balance Bike
Pedaling while using training wheels and pedaling with NO training wheels are entirely different skills. For this reason, we strongly encourage families to start their kids on a balance bike.
Many kids are ready to try a balance bike when they are about 18 months to 2 years. However, all five of my kids were about 2 to 2.5 years before they could coast well on a balance bike.
We urge parents to start with balance bikes because learning to ride a balance bike teaches them the hardest skill to master – balancing! Balancing takes a lot of patience and practice, but it is super fun to watch.
Need tips on how to get your child riding a balance bike? Start here!
Is your older child starting to ride? Don’t worry, they are not too old to learn how to balance too!
How to Teach a Kid to Pedal Tip 1: Choose a lightweight bike
I know this may be hard to swallow, but it is well worth it to spend money on a lightweight bike, especially when kids are just learning to pedal.
I have seen SO many kids who were struggling to pedal a heavy bike, but as soon as they ride a lightweight bike they begin pedaling up very quickly. The lightweight bike allows them to focus on riding instead of fighting a bike that sometimes weighs almost as much as them!
We encourage you to check out this post about 5 Myths about Kids Bikes that Every Parent Needs to Know.
Uncertain where to find a lightweight bike? Here are the top brands we recommend. Each brand has the option to purchase a freewheel (which we highly recommend you do!)

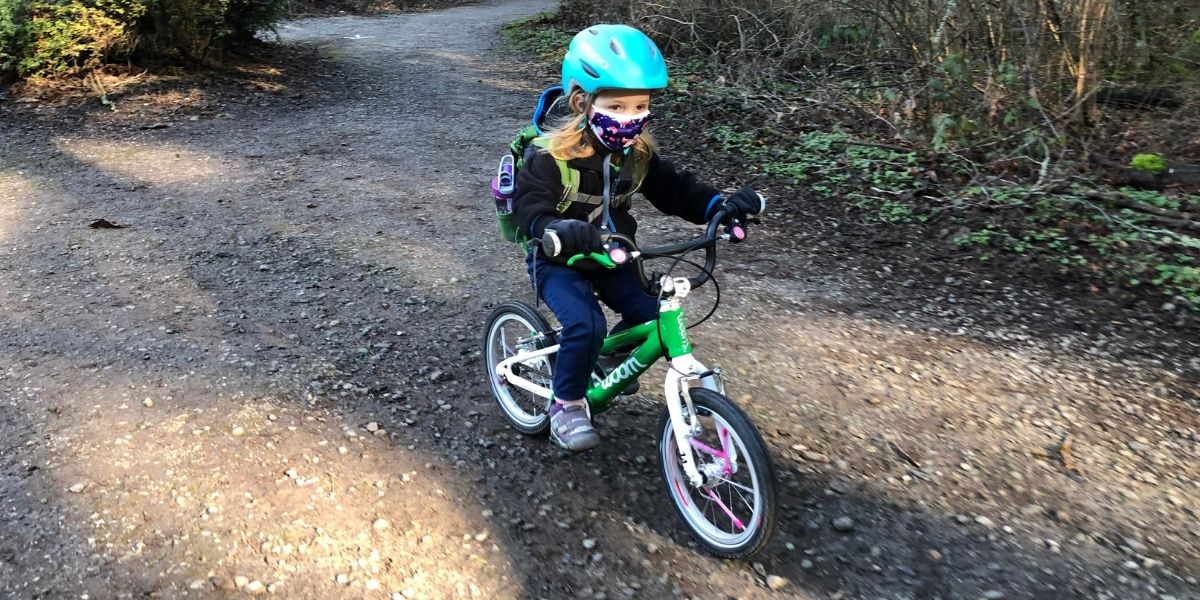
Woom Bikes: These lightweight bikes are our top pick for kids just learning to ride. We love the upright stance (perfect for timid riders) and the bike’s quality. Check out our Woom bike reviews here.

Prevelo Bikes: Prevelo bikes are perfect for kids who are a bit more aggressive and would do well with a slightly more leaned-over stance.

Pello Bikes: A solid choice, the Pello bike has a slightly more upright stance like the Woom. While it is heavier than the Woom or Prevelo bikes, but it is another really good quality bike for kids.

Spawn Cycles: Another lightweight option with more aggressive geometry and off-road capabilities. If your kid is likely to spend a lot of time riding trails, then the Yoji is the intro bike for her.

Teach a Child to Pedal a Bike: Say “No” to Coaster Brakes
Coaster brakes are engaged when the pedals are rotated backward. Not only are coaster brakes not safe, but they also simply confuse those learning how to pedal.
Coaster brakes are heavier
The coaster brake is heavier than the freewheel. The bike is just easier to pedal without it.
Coater brakes aren’t safe
An emergency stop is only possible with coaster brakes when one of the pedals is at the 1 o’clock position while riding. This creates significant risks because the child can only perform an emergency stop when the pedal is positioned correctly. Yikes!
If the pedal is not in the correct position during an emergency, your child might not be able to brake adequately. We’ve seen this be an issue for both of our boys.
Hand brakes are a good life-long tool
Using a hand brake will make your child’s ride much easier in the long run and most important of all, much safer. Take care to teach your child how to use hand brakes — especially the front brake. The front brake (usually on the left side) delivers the braking power (and can quickly send them over their handlebars if they use it too aggressively!).
When your child is first learning to use the hand brakes, take them on a gentle decline and let them experiment with what compressing each separate brake feels like. Let them gain some speed while you’re hanging on to them – a backpack can become a great makeshift “harness” that won’t destroy your lower back!
With some momentum and speed, they can sense how to use the brakes to maintain control. Give them voice prompts on when to squeeze and when to release. Woom bikes have an especially handy setup with color-coded brake levers, which really helps when littles are still figuring out right versus left!
It is essential that children learn to work both brakes as they grow up and ride more aggressive trails. The coaster brake is just not safe because it only brakes one wheel.
Check out this helpful video from Buddy Pegs on how to adjust your child’s handbrakes to fit them correctly, letting the rider brake more easily.
Quick note: The U.S. Consumer Product Safety Commission requires that bikes with a maximum seat height of 25″ or less have coaster brakes. The CPSC rule applies to bike companies, not individual consumers. In the U.S., bikes that fit this description are shipped to customers with a coaster brake, but the bikes from all of our recommended manufacturers also come with front and rear hand brakes. Installing the optional freewheel in place of the coaster wheel allows for the exclusive use of the hand brakes. Make note of this when purchasing a bike, and make sure that you purchase the freewheel kit! You can either install it yourself or take it to any bike shop to have it installed.
Go Pedal-Free
Has your child has outgrown their balance bike and is balancing well? They’re ready for a bigger bike with pedals… but it’s best for them to get used to the bike first and THEN the pedals.
A child who has mastered gliding on a standard 12″ balance bike will typically appear to regress a little when they jump up to a 14″ – that’s totally normal and not a big deal!

With both of our kids, we have gone through a transition phase where they bounce back and forth between bikes – the balance bike they are comfortable on, and the slightly bigger bike with the pedals off.
We try to just keep giving them opportunities to choose the bigger bike without pushing too hard. Even a few minutes experimenting with the feel of something new is a win!
It may take a while, but the more you give them the opportunity to choose the “big kid bike” the more likely they are to give it a try. Consider making this part of your daily routine, even just on the sidewalk in front of your house or around the block, even for just 5-10 minutes!
Consistency with small kids is a great way to build comfort, confidence, and proficiency.
Team Member Jessica
This (old) Buddy Pegs video shows how to take off and put on pedals.
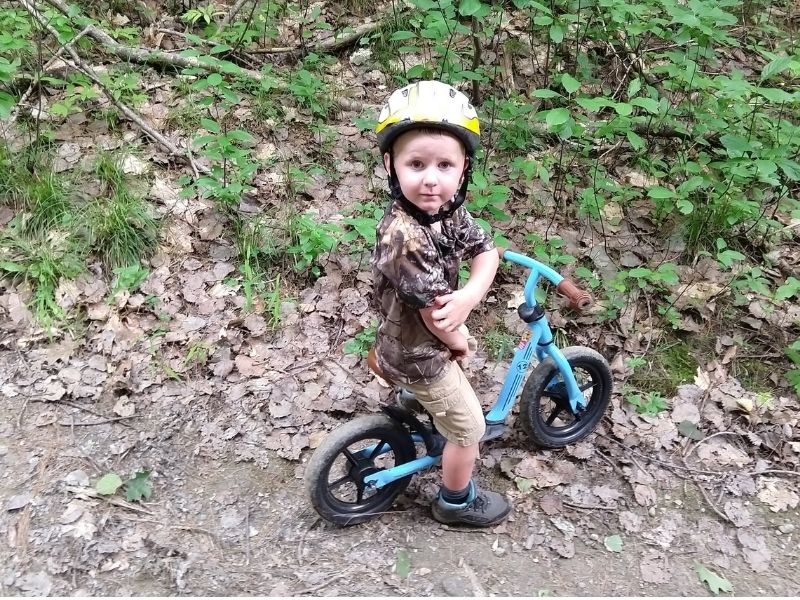
Practice With a Ramp
A gentle ramp or a small hill is the best place to start with a good glide and then begin pedaling. It is impossible for anyone — let alone a child — to stay upright on a bike that isn’t moving!
As kids learn to balance, either on a balance bike or as they start to pedal, the decline gives them a boost of momentum. At the very least, make sure they are not starting out on an incline!

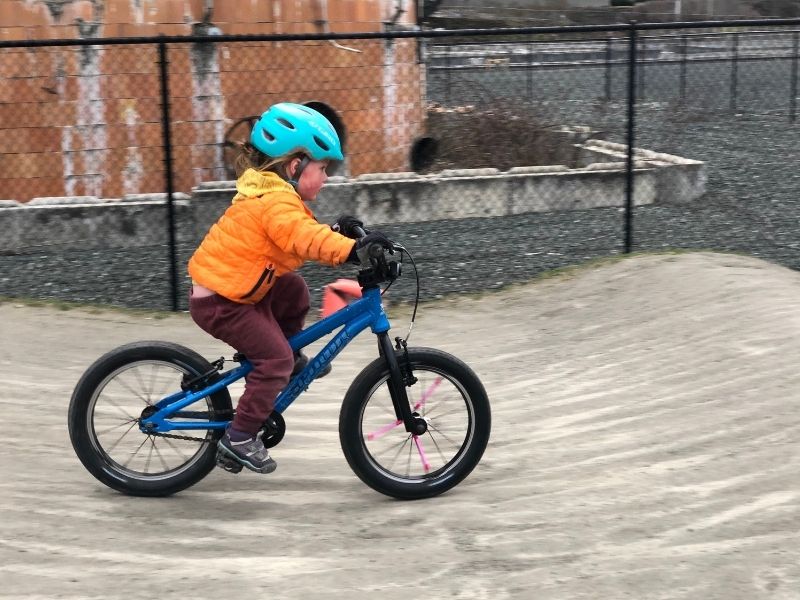
Our little guy took a long time to develop an interest in his balance bike. He had it over a year and rarely wanted to ride, and when we did take it out he would never pick his feet up and glide.
Our big breakthrough came when we took his bike to a hiking trail we frequented which had a small pump track near the trailhead. He asked to ride his bike on the ramps and although I didn’t think he was ready I allowed him to give it a try.
He LOVED it.
The momentum he got on the hills prompted him to lift his feet more and try to balance. A light bulb went off in my brain and we started riding on long, gentle downhill stretches around our neighborhood and his balancing skills took off.
Now he cruises around with his feet up on long-distance glides. We will use this same technique as we transition to pedals as well.
TMM Team Member Emily
Support the Kid, Not the Bike
The more your child can safely feel how the bike responds to them, the better! This less-is-more mentality can be scary for both kids and parents in the wobbly early stages, but there are safe ways to ease into it.
If you hold on to your kid’s handlebars, you will often find that you’re battling with them for control and making them feel less stable. Likewise, holding on to the back of their seat is awkward for everyone.
In the early stages, the best way to stabilize your child is to hold them using either a backpack or a gentle grip with your hands under their armpits. From this position, you can propel them forward and help them stop while they are still adjusting to hand brakes.

Frequent Challenges to Teaching a Kid to Pedal a Bike
Below are a few issues that come up when teaching kids to pedal and our solutions.
Challenge #1: They’re scared to pedal and/or go too fast
Not all kids jump on their bikes and ride right away! Riding can be especially challenging for kids that feel out of control when they are going fast. That’s ok. Take it easy, don’t push them, and trust they will get it on their own time.
There are lots of helpful tips in this post about handling a reluctant biker! Don’t miss it!
Challenge #2: We don’t own a balance bike (and don’t want to purchase one!)
From Team Member, Rita:
Balance bikes were not on our radar when we first started teaching our oldest children (now 12) to bike. We found secondhand 12- and 16-inch (heavy!) bikes and took it from there. We even bought training wheels, even though we now know they don’t help a whole lot.
Here are some key tips that helped our kids to ride (because of course, everyone except the youngest learned on the bikes we already had).
Make sure your child is on a bike where they can easily touch the ground with their feet. This helps them feel secure. Let them kick the bike with the pedals on. Or, take the pedals off so they can learn to balance without pedals knocking their shins. Go for walks on level, smooth surfaces where they can get the feel for balancing and steering.
Skip the training wheels –- they honestly made my children feel MORE insecure about pedaling independently. Don’t rush into them pedaling –- it often makes a child more anxious.
When ready, let your child practice pedaling with you holding the bike for support. Make sure they practice stopping and starting. They might need several practice sessions with you for support.
When they’re ready to try pedaling, find a spot with a slight downhill slope (or rig up a simple ramp, as referenced in the above section). Smooth ground works best. (We tried getting our kids biking on our bumpy lawn, but it was always harder).
Help them get pedaling, and then let them fly! Run ahead to catch them if they forget how to stop. Do over many times –- practice will make perfect, and they’ll be on their own in no time.
Once they are independent on their 12- or 16-inch bike, make sure it fits them well. Children very quickly outgrow the smaller sizes, and it’s actually easier for them to balance on a bigger bike than one that’s too small.
Challenge #3: They only pedal backwards when learning to pedal
This usually happens to children who are still learning coordination and can be resolved with some quick tips. We love the following from Prevelo bikes. Check out their full post here.
Methods to address coordination issues (from Prevelo Bikes):
Practice Getting their Feet on Pedals: For riders who struggle to quickly place their feet on the pedals: Have the rider sit on the bike while you keep the bike upright. Now tell the rider that when you say “pedals”, the rider has to lift their feet to the pedals as quickly as possible. Do this a few times until the rider can quickly get their feet on the pedals.
Practice Pedaling Forward: Find a way to let your child practice pedaling without having to worry about steering or balance. If you have a bike trainer that will fit your child’s bike, you can put the bike on the trainer and give the rider an opportunity to pedal without worrying about balance.
If you don’t have a trainer, and if you have the strength, you can accomplish the same thing by letting your child sit on the bike and practice pedaling while you hold the rear wheel off the ground. Usually, I do this by grabbing the bike by the saddle and lifting. (Just make sure the saddle clamp and seat post clamp are both very secure!) Your goal is to let the rider experience pedaling independently from trying to to balance a bike.
Check the Bike Setup: Many children will occasionally back pedal. If the child pedals forward enough to stay balanced, a little bit of backpedaling is fine. However, if a bike has a coaster brake (a brake activated by pedaling backward) each time the child does this, the brake will activate. This can frustrate the child and is why we recommend bikes with a freewheel and handbrakes only.
Finally, if the rider is consistently backpedaling when one foot approaches the top of the pedal stroke, the seat might be too low. A seat set too low will be uncomfortable to spin through the top of a pedal stroke because it will force the rider’s knee uncomfortably high. If you think this is an issue, you can experiment with raising the seat slightly. Be gentle when raising the seat on a first time rider – if your rider appears intimidated by the increase in seat height, lower the seat.
Teach a Child to Pedal a Bike
© 2025, Tales of a Mountain Mama. All rights reserved. Republication, in part or entirety, requires a link back to this original post and permission from the author.